
How to install pfSense in a VM
Today we'll go over installing and running pfSense as a VM in XCP-ng. This will be the first in a series of articles helping you to get the most out of XCP-ng, the turnkey and open source hypervisor.
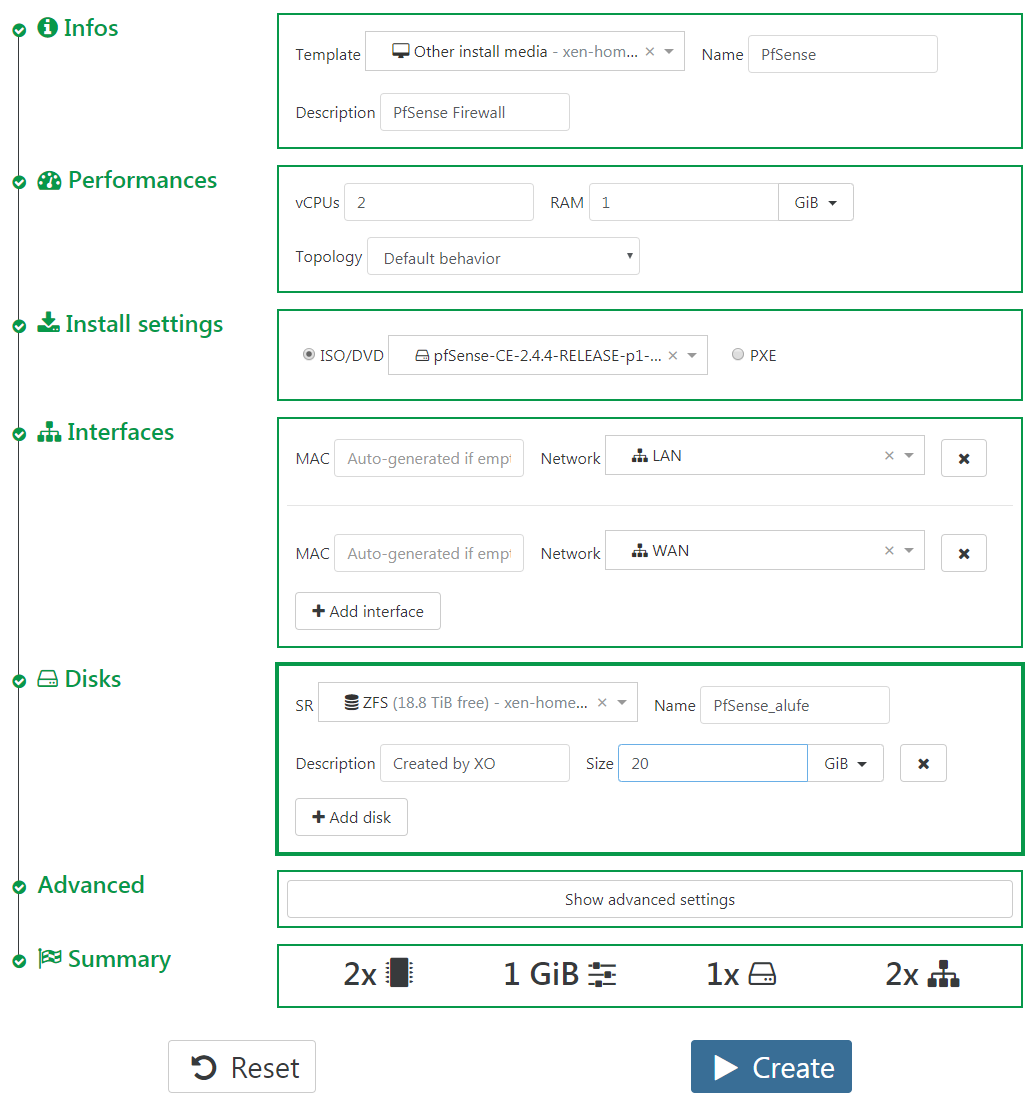
1. Create a new VM
Simply create a VM, and choose the Other install media VM template. Be sure to select the pfSense install ISO as well. As shown in Xen Orchestra:
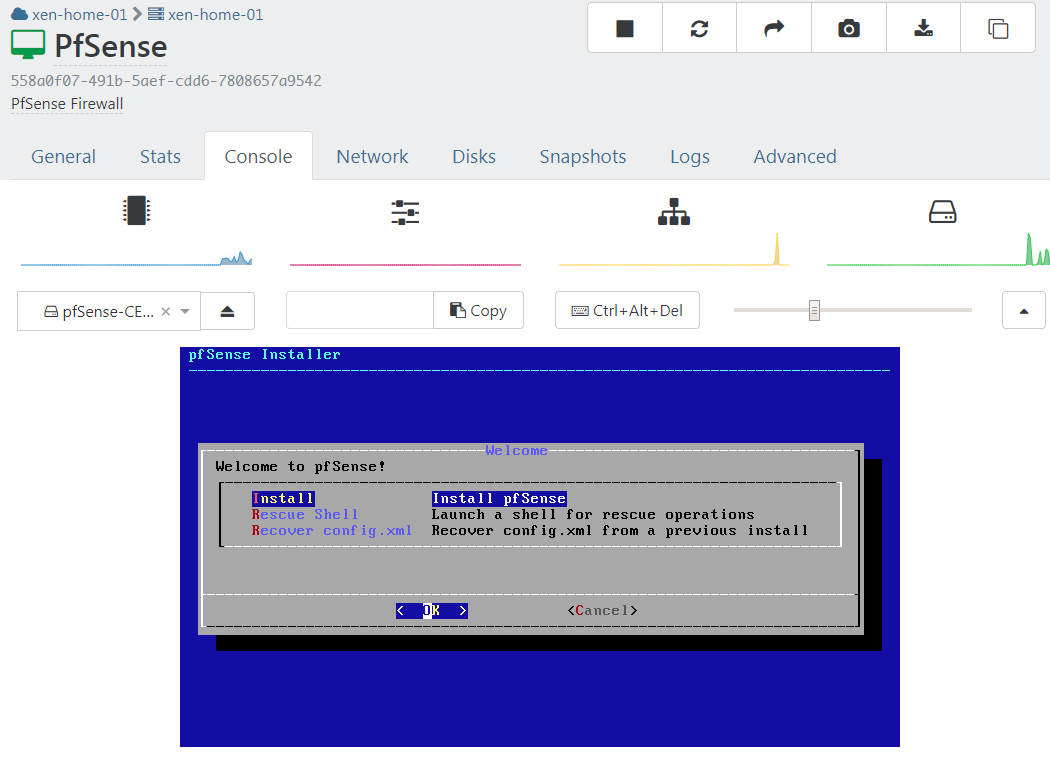
Once it's been created, navigate to the console tab in XOA and simply follow the PfSense installer dialog:
2. Install Guest Utilities
Once you've finished with the installer and have pfSense booted, we need to install guest utilities and tell them to run on boot. SSH (or other CLI method) to the pfSense VM and run the following commands:
pkg install xe-guest-utilities
echo 'xenguest_enable="YES"' >> /etc/rc.conf.local
ln -s /usr/local/etc/rc.d/xenguest /usr/local/etc/rc.d/xenguest.sh
service xenguest start
Guest Tools are now installed and running, and will automatically run on every boot of the VM.
3. Disable TX Checksum Offload
Now is the most important step: we must disable tx checksum offloading on the virtual xen interfaces of the VM. For an explanation on why this needs to be done, there is more information in the XCP-ng wiki entry.
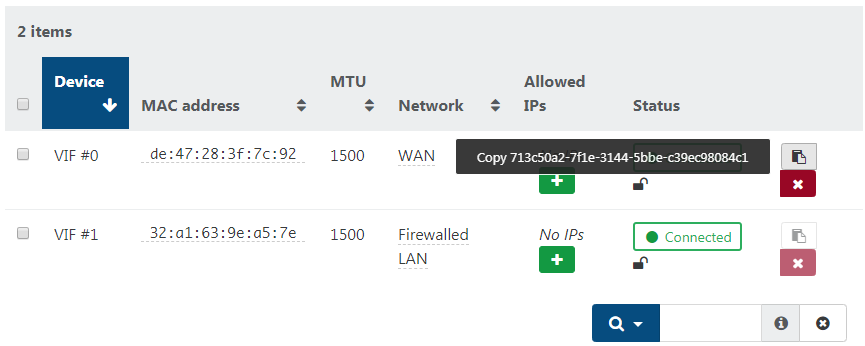
First we need to get the VIF (Virtual InterFace) UUID for each interface. In XOA, access the PfSense VM view, then go to the "Network" tab, and use the "Copy" button on the right side to copy the UUID to your clipboard:
Then, SSH into your host (or any host of your pool) and run the following command, but with your interface UUID:
xe vif-param-set uuid=<VIF_UUID> other-config:ethtool-tx="off"
In our example we have 2 VIFs, so we need to do the command for both interfaces:
xe vif-param-set uuid=789358b4-54c8-87d3-bfb3-0b7721e4661b other-config:ethtool-tx="off"
xe vif-param-set uuid=a9380705-8da2-4bf7-bbb0-f167d8f0d645 other-config:ethtool-tx="off"
That's it! For this to take effect you need to fully shut down the VM then power it back on. Then you are good to go!
Do not forget: If you ever add more virtual NICs to your pfSense VM, you will need to go back and run the above command for them as well.
That's all it takes to get pfSense virtualized with XCP-ng. You can expect no problems saturating gigabit interfaces.
Going further: VLAN trunking
If you want to play with "advanced" features, our wiki got a dedicated page about VLAN trunking: https://docs.xcp-ng.org/guides/VLAN-trunking-vm/
Stay tuned for more helpful guides on getting the most out of XCP-ng!