Any updated tutorial on how to create new cloud images?
-
agree 1000% which is why when you guys get things to work; please share it like the tutorials in the past
will help many people and draw many to XCP-ng and thus to Vates
-
@encryptblockr The issue is the cloud-init project is so disorganized and is constantly introducing more and more OS-dependent workarounds, bugs, and oddities that any documentation will become useless in a few months. I maintain our XOA Hub cloud-init builds, and I have to personally rewrite my own documentation every single time we push out a new image because cloud-init has broken something new, changed or removed config options without documenting it, or the underlying OS has changed how it deals with networking files etc and cloud-init has not been updated to deal with that. For example: I don't think the below will work any longer networking wise with netplan based distros, like newer ubuntus.
For debian/ubuntu, this is my rough process currently, but it's not worth putting in an official blog or document guide because it will be rendered useless and just cause people frustration the next release cloud-init puts out, the next debian or ubuntu version change, etc. You'll note none of this is related to XCP-ng at all (except for xen tools obviously), so the below is documentation cloud-init should really be publishing themselves - I have a feeling they also know it would quickly be rendered useless as well so they don't bother. Anyway:
#create a new debian or ubuntu VM in XCP-ng with a ~10gb disk. During the install ISO process, you'll have to choose manual partitioning, and either remove the swap partition completely from the partition layout, or move it to the beginning of the disk. If you choose auto partitioning, it will put a swap partition after the data partition, so the data partition won't be able to be expanded on your template. Once it's installed and running, install xcp-ng guest utilities. To get the latest version, use our guest-utilities ISO. Once all that xen-specific stuff is done, you can start the cloud-init setup: Start with installing cloud-init in the first place:
apt-get install -y cloud-init cloud-utils cloud-initramfs-growrootSet the root and default user to random passwords, then disable password logins (this is done on our templates so only pubkey based logins are accepted, skip this optionally):
echo 'root:dfgdfgdfg' | chpasswd
echo 'ubuntu:dfgdfg' | chpasswd
passwd -l root
passwd -l ubuntu
nano /etc/ssh/sshd_config #set permitrootlogin to "no"
Clean networking stuff that the VM picked up via dhcp from your current network, they will be re-populated with current info whenever the template is deployed:
nano /etc/resolv.conf #remove all
nano /etc/hosts # remove everything but localhost
Now the important part, set the main cloud init config. Edit
/etc/cloud/cloud.cfg- What exactly you need to edit here is impossible to document, as the default values in this file change across every OS, and are changed across every cloud-init version, with no documentation indicating they have done so. The actual behavior of a given option has also been changed out of nowhere. So I'll try to summarize. You want to remove anydatasource_listordatasourceblocks, and replace them with these values:datasource_list: [ NoCloud, ConfigDrive ] datasource: ConfigDrive: dsmode: local NoCloud: fs_label: cidataYou'll need to find and change (or add) these vars as well so networking is properly handled:
manage_resolv_conf: true
manage_etc_hosts: true
preserve_hostname: false
Also find the
default_userblock, and change it to whatever username you set up during the install ISO (the user aside from root). On our templates we name this user after the OS, so the non-root user on the ubuntu template is "ubuntu", so that part of the cloud-init config looks like this:default_user: name: ubuntuIf your file doesn't have the following somewhere in it, add it (I've had to add it on some builds, on other builds it was magically there already):
users:
   - default
disable_root: true
On some older cloud-init versions, I had to manually re-order the module init staging order, because cloud-init could not be bothered to get this right themselves. I think (???) this has been resolved in later builds, but again it changes constantly so there's no way to know. Basically, ensure these three modules are under the first "cloud_init_modules" that run during the init stage, not under the later config or final stage:
 - set_hostname
 - update_hostname
 - update_etc_hosts
Save the config file, and hopefully you're done with that. I can't outline just how unreliable documenting this file is - the defaults, the behavior of certain options, or even the presence of certain options changes entirely across OS's and cloud-init versions, so I can't just keep a "master copy" of the config file and expect it to work. You have to examine the default file you get line by line and work towards the values above until the template works properly. When it stops working properly 3 months later, browse the cloud-init mailing lists and github issues to figure out which option's behavior they changed without any warning, and repeat.
Now remove all the random config files that cloud-init occasionally decides to install that will override your own config and render it useless. This list of files changes whenever cloud-init builds feel like it, so just look in the parent directory to see what's there on your specific cloud-init version:
rm -rf /etc/cloud/cloud.cfg.d/99-installer.cfg /etc/cloud/cloud.cfg.d/90_dpkg.cfg /etc/cloud/cloud.cfg.d/subiquity-disable-cloudinit-networking.cfgRemove any stuff the VM picked up that you don't want in all your templates. This also cleans any cloud-init runs that might have occurred if you rebooted the VM, so the template you end up with will be "fresh". We also remove the command history for the root user and default user
rm -rf /etc/ssh/ssh_host_*
cloud-init clean --logs
su - ubuntu
cat /dev/null > ~/.bash_history && history -c && exit
cat /dev/null > ~/.bash_history && history -c && exit
Now you can shut the VM down and convert it into a template. Whenever deploying, it will already have xen guest tools, and a disk that will automatically be expanded to whatever you set the disk size to when deploying
NOTE: If you plan on using the "network config" cloud-init box during VM creation in XOA, note that whatever you put in that box is ADDED to the VM's default network config. It does not REPLACE it. That means when you follow the directions above, almost all OS's will have a default config of DHCP on eth0 in
/etc/network/interfaces- so if you fill out the cloud-init network box during VM creation to set a static IP, the VM will still read the DHCP config, get a DHCP address, then read the cloud-init created network config files under/etc/network/interfaces.d/*and add that static IP as well. If you want to configure VMs with only static IPs you configure during VM deployment with cloud-init for example, you would have to remove the dhcp config stuff out of/etc/network/interfaceson your template VM when creating it -
Thank you for this @fohdeesha. Once I shut down the system, convert to template, and go to spawn a new vm, I'm unable to modify the disk size to make it larger than the 10GB ...... the option is greyed out. What is necessary to make a template that allows for the disk size to be changed?
Thank you very much
-
It's greyed out in Xen Orchestra?
-
@olivierlambert yes.... from sources, not XOA.

I've configured the hard drive on the vm used to create the template as a single partition.
I found I could create a vm from the cli on the XCP-ng host and grow the vdi before booting, but I cannot find a way to resize the vdi in the new vm creation screen in XO.
I just went through and hit all of the radio button options in the install settings section, if I choose 'no config drive', I the drive size is greyed out. If I choose the 'ssh key' or 'custom config' radio buttons, the drive size box turns white and allows modification. I was figuring I could do all cloud.cfg changes in the machine before making a template and then wouldn't have to add the small config disk, but do need to resize the drive to a useful size.
Thank you again.
-
This post is deleted! -
Ah yes you indeed need to allow cloud config to enjoy disk growing, otherwise it's meaningless
")
-
@olivierlambert Thank you so much for the prompt response. Would the usual approach be to remove the small drive that is created and attached to the VM after the first configuration?
-
Indeed, there's no need to keep it afterward
-
creating custom partition on Ubuntu has become rocket science
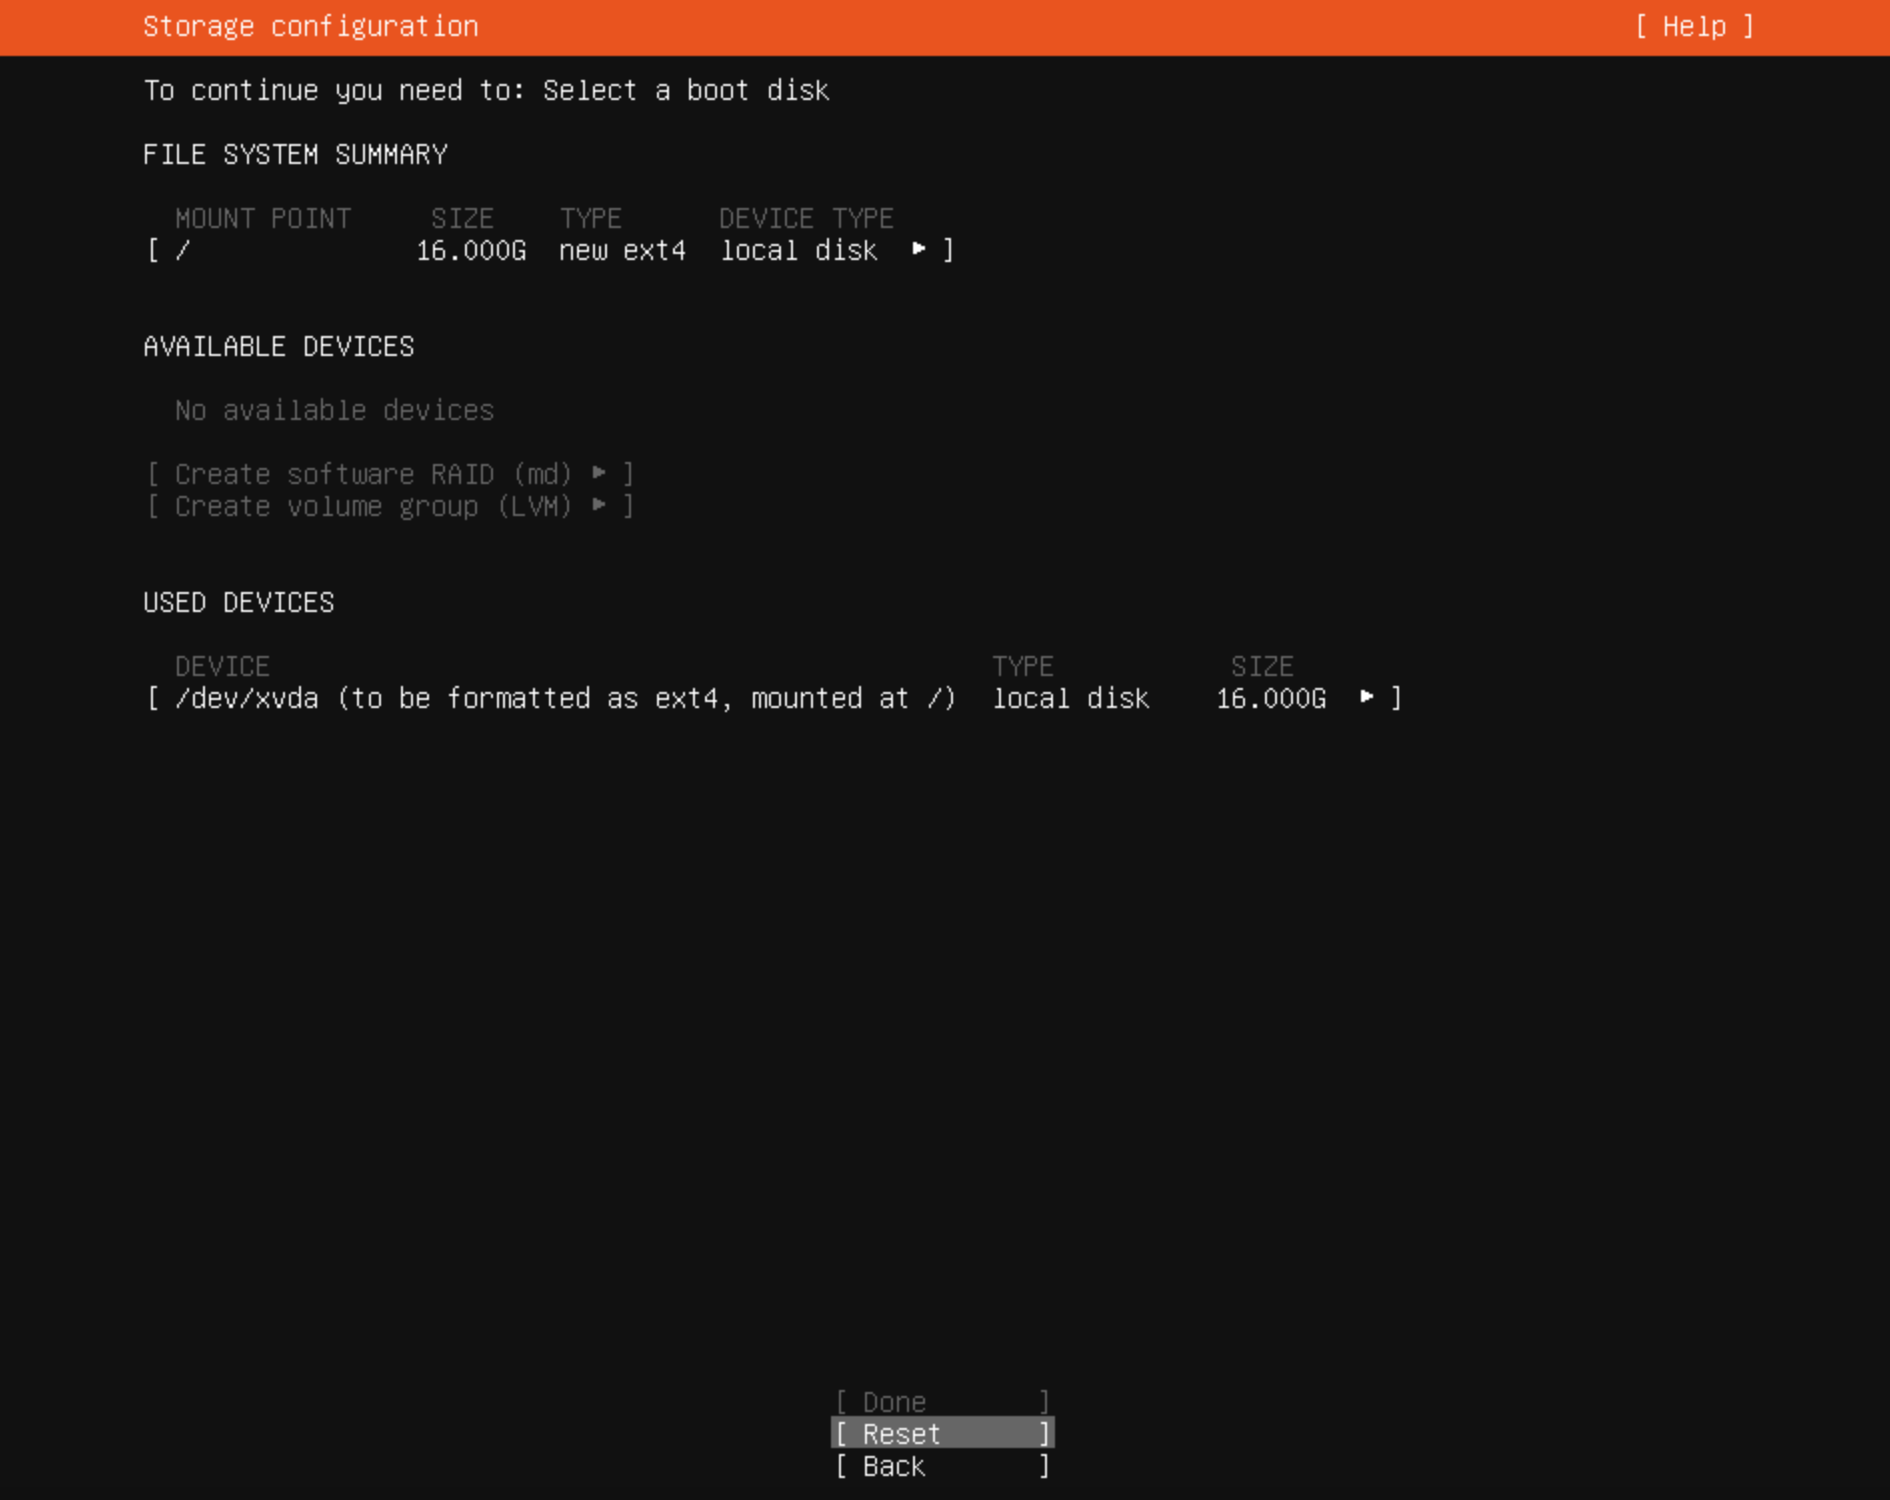
i am unable to use whole disc as needed for the cloud image"done" is greyed out and am not sure what config i need to have to use whole disk and be able to move to next step
can you please help?
-
anyone know how to create single partition to create cloud image for ubuntu 22.04?
from screenshot above am unable to proceed to next step as
doneis greyed outwhat do i need to do or can someone share screenshot of what this should look like?
-
@encryptblockr Did the new 2022-11-24 images work better?
Did you remember to install cloud-initramfs-growroot ?packages:
- xe-guest-utilities
- cloud-initramfs-growroot
- cloud-initramfs-rescuevol
-
@encryptblockr yup, welcome to cloud-init hell. Your issue is definitely ubuntu related though, if I had to guess, the installer wants/requires a swap partition. Just create a 1 or 2gb swap partition as well, but put it first in the partition table, so the root partition after it has room to grow. You'll also run into some network issues probably when trying to use your new template, as ubuntu has moved to new netplan crap to manage networking in the OS, and cloud-init has a ton of bugs with it
-
Also note the text at the top of your screenshot: to continue you need to select a boot device. There might be a way in that menu (or partition creation submenu) to mark that created partition as bootable, or maybe you just need to highlight/select the partition under "used devices" before hitting "done"
Hello! It looks like you're interested in this conversation, but you don't have an account yet.
Getting fed up of having to scroll through the same posts each visit? When you register for an account, you'll always come back to exactly where you were before, and choose to be notified of new replies (either via email, or push notification). You'll also be able to save bookmarks and upvote posts to show your appreciation to other community members.
With your input, this post could be even better 💗
Register Login