Install XO from sources.
-
While this project is more for myself it is open to others to use. Please use at your own risk. As always review the script before using in a production environment. Please leave any feedback or suggestions. https://github.com/acebmxer/install_xen_orchestra/
https://forums.pozzatech.com - You can read more about this project and other things over in my personal forums.Automated installation and management of Xen Orchestra from source.
Update 5/15/26 - This update only applies to anyone using older version of script. See note. Also added option to Adjust Xen Orchestra Memory Allocation. It will look at the system memory and suggest setting for XO based off the official documentation.
⚠️ Upgrading from an earlier version of this script? Read this first.
This version bumps the config schema to v2 (adds PUBLIC_URL and ENCRYPT_REDIS_CREDENTIALS) and corrects two config.toml generation bugs. Your xo-config.cfg is migrated automatically and non-destructively, but the corrected /etc/xo-server/config.toml is only written by --reconfigure.

Run --reconfigure once before resuming normal updates:

./install-xen-orchestra.sh --reconfigure
This regenerates config.toml with the fixes (your old file is backed up first; data in /var/lib/xo-server is untouched). It is strongly recommended if you set both REDIRECT_TO_HTTPS=true and REVERSE_PROXY_TRUST — that combination previously produced a duplicate [http] section and silently dropped one of the settings.

Afterwards, run --update as normal for routine XO updates — --update does not need to be preceded by --reconfigure again.
Available Functions
Function CLI Flag Description Install --installFresh install of Xen Orchestra Update --updateUpdate existing installation (with backup) Restore --restoreRestore from a previous backup Rebuild --rebuildFresh clone + clean build, preserves settings Reconfigure --reconfigureApply config changes without rebuilding XO Proxy --proxyDeploy XO Proxy to a Xen pool master Edit Config (menu only) Open xo-config.cfgin your preferred editorRename Config (menu only) Rename sample-xo-config.cfgtoxo-config.cfgRunning without flags launches an interactive menu. All flags also work directly:
./install-xen-orchestra.sh           # interactive menu
./install-xen-orchestra.sh --update  # run update directly
./install-xen-orchestra.sh --help    # show all options
Interactive Menu
Running the script with no arguments opens a two-column menu with keyboard navigation:
  ╔══════════════════════════════════════════════════════════════════════════════════╗
  ║              Install Xen Orchestra from Sources Setup and Update                 ║
  ╚══════════════════════════════════════════════════════════════════════════════════╝

                        Current Script Commit : 693f4 (Branch: main)
                        Master Script Commit  : 693f4 (Branch: main)
                        Current XO Commit     : a1b2c (Branch: master)
                        Master XO Commit      : d4e5f (Branch: master)
                        Current Node          : v24.15.0

  ──────────────────────────────────────────────────────────────────────────────────

  ▸ [✓] Install Xen Orchestra                   [ ] Reconfigure Xen Orchestra
    [ ] Update Xen Orchestra                    [ ] Rebuild Xen Orchestra
    [ ] Rename Sample-xo-config.cfg             [ ] Edit xo-config.cfg
    [ ] Install XO Proxy                        [ ]  Restore Backup
                         [ ] Adjust Xen Orchestra Memory Allocation

  ──────────────────────────────────────────────────────────────────────────────────

  Selected: 1

  ↑↓←→ Navigate   SPACE Select/Deselect   ENTER Confirm   Q Quit
Select one or more items with SPACE, then press ENTER to run them.
Quick Start
git clone https://github.com/acebmxer/install_xen_orchestra.git
cd install_xen_orchestra
cp sample-xo-config.cfg xo-config.cfg
nano xo-config.cfg   # edit to your liking
./install-xen-orchestra.sh
Do NOT run with
sudo. Run as a normal user with sudo privileges — the script handlessudointernally.If
xo-config.cfgdoesn't exist, it will be created automatically from the sample.Configuration
All settings live in
xo-config.cfg. See sample-xo-config.cfg for full documentation of every option.Key settings:
Option Default Description HTTP_PORT80 HTTP port HTTPS_PORT443 HTTPS port INSTALL_DIR/opt/xen-orchestra Installation directory GIT_BRANCHmaster Git branch or tag NODE_VERSION24.15.0 Node.js version SERVICE_USERxo-service Service user (set to rootfor VMware V2V import)BACKUP_KEEP5 Number of backups to retain BIND_ADDRESS0.0.0.0 Bind address REVERSE_PROXY_TRUSTfalse Trust X-Forwarded headers from proxy IP Note on
BACKUP_KEEProtation: The retention policy only applies to backups created by the current version of the script. Backups made by older script versions may use a different naming convention and will not be counted or pruned by the rotation logic. If you are upgrading from an older version, manually review your backup directory (BACKUP_DIRin config, default/var/lib/xo-backups) and remove any legacy-named archives you no longer need.Default Credentials
After installation, access the web interface at
https://your-server-ip.- Username:
admin@admin.net - Password:
admin
Change the default password immediately after first login.
Supported Operating Systems
- Debian 10/11/12/13
- Ubuntu (all supported versions)
- RHEL / CentOS / AlmaLinux / Rocky
- Fedora
Running Task Detection (Update Safety)
Before applying an update, the script queries the Xen Orchestra REST API for active tasks (e.g. running backups, VM exports). If any are found, the update is aborted to prevent data loss or corruption.
Authentication
Only admin-level XO accounts can access the REST API. Authentication is resolved in priority order:
Priority Method Source 1 Auth token XO_TASK_CHECK_TOKENinxo-config.cfg2 Credentials XO_TASK_CHECK_USER/XO_TASK_CHECK_PASSinxo-config.cfg3 Interactive Prompted at runtime (press Enter to skip) Recommended: Dedicated XO Account
It is recommended to create a dedicated XO web UI account solely for the task check (e.g.
task-checker@local.net). This account:- Must have Admin privileges (required by the REST API)
- Exists only within the XO web interface — no shell access, SSH keys, or OS-level permissions are needed
- Provides a clear audit trail separate from personal accounts
- Prevents shared credentials from being used for unrelated actions
You are free to use any admin account you choose, but a dedicated account is the safest approach.
Using an Auth Token (Recommended)
Tokens are more secure than storing a password — they can be revoked independently and expire after 30 days by default.
- Log into the XO web UI with the dedicated account
- Generate a token:
curl -X POST -u 'task-checker@local.net:yourpassword' \ https://localhost/rest/v0/users/me/authentication_tokens -k - Copy the
idfield from the response - Add to
xo-config.cfg:XO_TASK_CHECK_TOKEN=UlTBEnFeL12XocK-7Qx-DKvOYbPn0eG7Z2oMvOniNjg
Using Credentials
Alternatively, store the account credentials directly:
XO_TASK_CHECK_USER=task-checker@local.net
XO_TASK_CHECK_PASS=changeme
If neither token nor credentials are configured, the script will prompt interactively during each update.
Environment Variables
Variable Description XO_DEBUG=1Enable debug mode ( set -x)XO_NO_SELF_UPDATE=1Skip automatic script self-update Troubleshooting
Check service logs:
sudo journalctl -u xo-server -n 50If the build is broken, rebuild (takes a backup first):
./install-xen-orchestra.sh --rebuildBuild fails with OOM / out-of-memory error
The Yarn build is memory-intensive. On hosts with less than 2 GB RAM the Node.js process can be killed by the kernel OOM killer mid-build, leaving an incomplete install.
Add or increase swap to give the build room:
sudo fallocate -l 2G /swapfile
sudo chmod 600 /swapfile
sudo mkswap /swapfile
sudo swapon /swapfile
Re-run the install or
--rebuildafter the swap is active. To make it permanent across reboots, add/swapfile none swap sw 0 0to/etc/fstab.NodeSource GPG key failure (air-gapped / offline hosts)
On hosts without internet access (or with strict egress firewall rules) the NodeSource repository setup script fails because it cannot reach
keyserver.ubuntu.comordeb.nodesource.com.Option A — pre-download and import the key manually, then copy the
.deb/.rpmpackages to the host.Option B — set
NODE_VERSIONto a specific patch version (e.g.24.15.0) inxo-config.cfg. The script will then download a pre-built binary directly fromnodejs.orginstead of using the NodeSource package repository.gitreports "dubious ownership" and exitsRecent versions of Git refuse to operate on a repository owned by a different user than the one running the command. This can happen when
sudois used inconsistently or when the install directory was created byrootbut the script is run as a normal user.Fix it by resetting ownership to match your
SERVICE_USER:sudo chown -R xo-service:xo-service /opt/xen-orchestraReplace
xo-servicewith the value ofSERVICE_USERinxo-config.cfg. Re-running the script afterwards will resolve the rest.RedHat / Rocky / AlmaLinux: SELinux denials or systemd capability errors
On SELinux-enforcing systems the
xo-serverservice may fail to bind ports or access network resources. Check for AVC denials:sudo ausearch -m avc -ts recent | grep xo-serverIf denials are present, generate and apply a local policy module:
sudo ausearch -m avc -ts recent | audit2allow -M xo-server-local
sudo semodule -i xo-server-local.pp
Alternatively, set the service to
permissivemode while investigating:sudo semanage permissive -a xo_server_taudit2allowandsemanageare provided by thepolicycoreutils-python-utilspackage on RHEL/Rocky/Alma.License
This project is licensed under the MIT License. Xen Orchestra itself is licensed under AGPL-3.0.
Credits
- Username:
-
@acebmxer Great job (I guess, will need to give it a try)
looked the script and seems pretty complete.Do you plan to add XoProxy install/update too ?
-
Maybe at some point. Unless someone would like to contribute that part. I want to make sure XOA install is good and stable first.
I just switch over my homelab to this install now.
-
I will make one suggestion that might be a problem for some users with really strict password requirements. Make the default password something more complex that doesn't contain the username or the word password.
One capital, one lower case, one number or special, and minimum 8 characters.Alternate would be a note calling our where in the script the default can be edited, this way you don't have to do much, and those that need the default more complex can change it themselves before they run the script.
I'll try this in the future when I move me lab up to XCP-ng version 9, no timeline on this since I wanted it done two weeks ago.
[edit] full of typos today, please excuse my mistakes
-
If you are referring to the login info admin@admin.net. That is per vates is documentation. It does prompt you to change that password.
There is a xo-config.cfg file where you can change most of the defaults but those that apply to install not for do itself.
https://docs.xen-orchestra.com/installation
First Login Once you have started the VM, you can access the web UI by putting the IP you configured during deployment into your web browser. If you did not configure an IP or are unsure, try one of the following methods to find it: Run xe vm-list params=name-label,networks | grep -A 1 XOA on your host Check your router's DHCP leases for an xoa lease tip Default Web UI credentials are admin@admin.net / admin Default console/SSH credentials are not set, you need to set them as described here. -
Maybe just semantics, but I have seen here on the boards people ask if they are running XOA or XO from sources. The A means appliance. I think it stops being an appliance if you are managing the OS and installing the app on top of it, so calling this XOA from sources is probably wrong and confusing.
Also, to get full features of XOA, you need to pay for it, so it seems like you are causing confusion with their paid service.
-
Yes I get what you say about the confusion with XO vs XOA. I know there is another person who maintains an install script calls it XO-CE but didnt want to call mine that specifically.
As for the feature set. You get full feature set when you install from sources. You just dont get paid support.
I have just not implemented the process of setting up a proxy via the script.
Edit - Updated title
-
@dcskinner @acebmxer I totally agree.... XOA is the Vates provided software appliance XO system.
Compiling XO yourself is XO from source or XO community edition or anything other than XOA. Calling it XOA adds confusion because it's not the same thing that Vates provides.
-
I appreciate the comments and they are all welcome. Do keep note that I did say this is not Production ready and use at your own risk. If you see anything that is wrong please provide suggest feedback to correct said issue.
I just started running my home lab from this version yesterday. I imported my config from previous XO. Today i saw 4 new commits and the update function updated to the latest commit. Backups have run with no issue.
As I can only test in my home lab I can only speak of my own experiences.
-
Just added the option for --proxy to deploy xo proxy.
https://github.com/acebmxer/install_xen_orchestra/tree/xo-proxy
Deploying a Proxy VM
The script supports deploying a Xen Orchestra Proxy VM directly to your XenServer/XCP-ng pool using the --proxy option:./install-xen-orchestra.sh --proxy
Important Limitations and Notes
 ️ Network Configuration:
The --proxy option does not allow you to specify which network the VIF is attached to
It will default to "Pool wide network associated with eth0"️ Production Use Warning:
Use at your own risk. Not advised for use in production environments.This feature is provided for testing and development purposes. For production deployments, it is recommended to manually configure proxy VMs with proper network planning and validation.
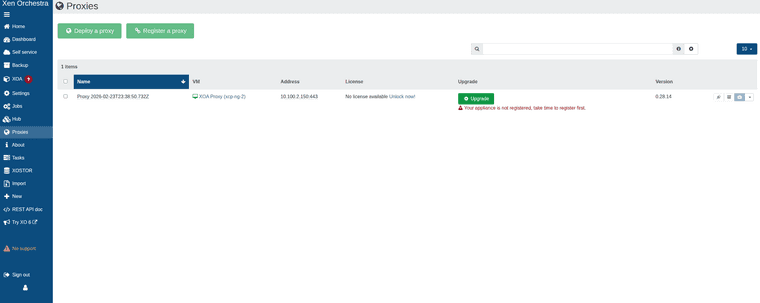


While can add host and remote via proxy. Backups will fail with the following error.
backupNg.runJob { "id": "95ac8089-69f3-404e-b902-21d0e878eec2", "schedule": "76989b41-8bcf-4438-833a-84ae80125367" } { "code": -32000, "data": { "stack": "TypeError: licenses.find is not a function at Function.<anonymous> (file:///usr/local/lib/node_modules/@xen-orchestra/proxy/app/mixins/appliance.mjs:168:23) at processTicksAndRejections (node:internal/process/task_queues:95:5) at file:///usr/local/lib/node_modules/@xen-orchestra/proxy/app/mixins/backups.mjs:110:25" }, "message": "licenses.find is not a function" } -
@acebmxer @ronivay stumbled upon this too
https://github.com/ronivay/XenOrchestraInstallerUpdater#backup-proxyBackup proxy
Proxy installation method is experimental, use at your own risk. Proxy installation from sources is not documented by Xen Orchestra team. Method used here is the outcome of trial and error.Proxy source code will be edited slightly to disable license check which only works with official XOA and there is no documented or working procedure to bypass it properly (there used to be but not anymore)
-
Yeah i was looking over his script to see how he worked around it but just states that.
I knew there would be limitations with it so i didnt add it to the main branch yet.
-
As I am completly new to this scripting and such I did reach out to Ai for assistance and believe the license check should be bypassed now.
Again not suggested to use in production. Use at your own risk.
still has its own branch for more testing before merging to main branch.
-
https://github.com/acebmxer/install_xen_orchestra
Made some improvements to the script including a inter active menu that will show commit for the script itself compared to the master commit. (should relected which branch you run the script from) With Xen Orchestra Commit comparison and show the Node version installed. The script should self update on launch.
Always review code before using. Use in production at your own risk.
Always open to ideas and suggestions.
╔══════════════════════════════════════════════════════════════════════════════════╗ ║ Install Xen Orchestra from Sources Setup and Update ║ ╚══════════════════════════════════════════════════════════════════════════════════╝ Current Script Commit : 693f4 Master Script Commit : 693f4 Current XO Commit : a1b2c Master XO Commit : d4e5f Current Node : v24.1.0 ────────────────────────────────────────────────────────────────────────────────── ▸ [✓] Install Xen Orchestra [ ] Reconfigure Xen Orchestra [ ] Update Xen Orchestra [ ] Rebuild Xen Orchestra [ ] Rename Sample-xo-config.cfg [ ] Edit xo-config.cfg [ ] Install XO Proxy ────────────────────────────────────────────────────────────────────────────────── Selected: 1 ↑↓←→ Navigate SPACE Select/Deselect ENTER Confirm Q Quit -
I haven't tried this yet, but liking the menu you just showed!
-
which is the difference with this?
https://github.com/ronivay/XenOrchestraInstallerUpdaterUsing the above around 5-6 years with no issues at all
-
I just wanted my own script to install Xen Orchestra from sources with a few additional features not found in Ranivays script. Mine is built completely from scratch but with inspiration form his script.
If you wanted to give my script a try I would appropriate any feedback to any improvements. I would suggest creating a new vm as i have not test my script against an installation done by Ronivays script.
-
@acebmxer
what have you added? what are the differences?
i will definetely try it. -
@AlexanderK
The inter-active menu, The menu will show the running script commit against main commit along with showing Xen Orchestra installed commit vs master commit. The script should automatically self-update to latest version.Just to name a few...
-
@acebmxer i think that only the menu. the "old" script also auto updates....
Hello! It looks like you're interested in this conversation, but you don't have an account yet.
Getting fed up of having to scroll through the same posts each visit? When you register for an account, you'll always come back to exactly where you were before, and choose to be notified of new replies (either via email, or push notification). You'll also be able to save bookmarks and upvote posts to show your appreciation to other community members.
With your input, this post could be even better 💗
Register Login