
# Guides
This section is grouping various guides regarding XCP-ng use cases.
# Reboot or shutdown a host
# General case
The proper way to reboot or shutdown a host is:
Disable the host so that no new VM can be started on this host and so that the rest of the pool knows that the host was disabled on purpose.
From command line:
xe host-disable host={hostname}.Migrate the VMs running on the host to other hosts in the pool, or shut them down.
Reboot or shutdown.
Can be done from XO, or from command line:
xe host-reboot|host-shutdown host={hostname}.(After a reboot or host startup) Move VMs back to the host if appropriate. There is no need to re-enable the host: it is done automatically when it starts.
WARNING
Step 1 is especially important if High Availability is enforced on your pool. You don't want the other hosts to believe that a host crashed or self-fenced - and take consecutive action - when it's actually planned maintenance. Alternatively, you can also disable HA on the pool for the duration of the maintenance operations to avoid issues caused by HA.
# With "agile" VMs
If all your VMs are "agile", that is, they're not tied to local storage or local devices (device pass-through), and if there are enough resources on other hosts in the pool, the above can be simplified as:
*Put the host into maintenance mode from Xen Orchestra. This will disable the host, then evacuate its VMs automatically to other hosts.
If you prefer to do it from command line, this is equivalent to:
xe host-disable host={hostname}thenxe host-evacuate host={hostname}.Reboot or shutdown
Can be done from XO, or from command line:
xe host-reboot|host-shutdown host={hostname}.(After a reboot or host startup) Move VMs back to the host if appropriate. There is no need to re-enable the host: it is done automatically when it starts.
# Logging system
WARNING
Any manual modification to the configuration files described below may prevent future XCP-ng updates to update the contents of those files. Avoid modifying them and ask for advice if you have a use case that appears to require such modifications.
# logrotate
logrotate is the tool to administrate the rotation, compression, removal, ... of log files.
The configuration is located in /etc/logrotate.conf; the /etc/logrotate.d directory is included by this file for additional rules (for example for specific packages after RPM installation like xha, blktap, SMlog...).
This configuration is used by the daily cron task /etc/cron.daily/logrotate.
By default a file is rotated if:
- its size is greater than 100 MiB (since XCP-ng 8.2.1)
- it's a new day (daily rotation)
Also a file is compressed after two rotations, the first time it is just renamed.
# rsyslog
Because a file must be rotated if a log exceeds 100 MiB, the rsyslog daemon is used to trigger automatically the /etc/cron.daily/logrotate script without waiting for the logrotate cron job to run. (Conf location: /etc/rsyslog.d/xenserver.conf)
# Specific config: xensource.log
xensource.log has many particular and different configuration parameters, so another logrotate config is used: /etc/xensource/xapi-logrotate.conf in a shell script /opt/xensource/libexec/xapi-logrotate.sh that executes logrotate with this specific config.
There is normally no need to run it manually, a cron task /etc/cron.d/xapi-logrotate.cron is present to schedule it each hour.
The goal of this special config is to keep the xensource.log files for one month, and to limit the number of log files to 100.
# pfSense / OPNsense VM
pfSense and OPNsense do work great in a VM, but there are a few extra steps that need to be taken first.
# 1. Create VM as normal.
- When creating the VM, choose the
other install mediaVM template - Continue through the installer like normal
# 2. Install Guest Utilities
There are 2 ways of doing that, either using the CLI (pfSense or OPNsense) or the Web UI (OPNsense).
Option 1 via console/ssh: Now that you have the VM running, we need to install guest utilities and tell them to run on boot. SSH (or other CLI method) to the VM and perform the following:
pkg install xe-guest-utilities
echo 'xenguest_enable="YES"' >> /etc/rc.conf.local
ln -s /usr/local/etc/rc.d/xenguest /usr/local/etc/rc.d/xenguest.sh
service xenguest start
Option 2 is via the Web GUI (only available on OPNsense):
Open the web UI on http(s)://your-configured-ip and go to:
System -> Firmware -> Plugins
Scroll down to os-xen and click the plus sign next to it to install them.
Next: Reboot the system to have the guest tools started (installer doesn't do this the first time):
Power -> Reboot
Guest Tools are now installed and running, and will automatically run on every boot of the VM.
# 3. Disable TX Checksum Offload
Now is the most important step: we must disable TX checksum offload on the virtual xen interfaces of the VM. This is because network traffic between VMs in a hypervisor is not populated with a typical Ethernet checksum, since they only traverse server memory and never leave over a physical cable. The majority of operating systems know to expect this when virtualized and handle Ethernet frames with empty checksums without issue. However pf in FreeBSD does not handle them correctly and will drop them, leading to broken performance.
The solution is to simply turn off checksum-offload on the virtual xen interfaces for pfSense in the TX direction only (TX towards the VM itself). Then the packets will be checksummed like normal and pf will no longer complain.
TIP
Disabling checksum offloading is only necessary for virtual interfaces. When using PCI Passthrough (opens new window) to provide a VM with direct access to physical or virtual (using SR-IOV (opens new window)) devices it is unnecessary to disable TX checksum offloading on any interfaces on those devices.
WARNING
Many guides on the internet for pfSense in Xen VMs will tell you to uncheck checksum options in the pfSense web UI, or to also disable RX offload on the Xen side. These are not only unnecessary, but some of them will make performance worse.
# Using Xen Orchestra
- Head to the "Network" tab of your VM : in the advanced settings (click the blue gear icon) for each adapter, disable TX checksumming.
- Restart the VM.
That's it !
# Using CLI
SSH to dom0 on your XCP-NG hypervisor and run the following:
First get the UUID of the VM to modify:
xe vm-list
Find your pfSense / OPNsense VM in the list, and copy the UUID. Now stick the UUID in the following command:
xe vif-list vm-uuid=08fcfc01-bda4-21b5-2262-741da6f5bfb0
This will list all the virtual interfaces assigned to the VM:
uuid ( RO)            : 789358b4-54c8-87d3-bfb3-0b7721e4661b
         vm-uuid ( RO): 57a27650-6dab-268e-1200-83ee17ee3a55
          device ( RO): 1
    network-uuid ( RO): 5422a65f-4ff0-0f8c-e8c3-a1e926934eed


uuid ( RO)            : a9380705-8da2-4bf7-bbb0-f167d8f0d645
         vm-uuid ( RO): 57a27650-6dab-268e-1200-83ee17ee3a55
          device ( RO): 0
    network-uuid ( RO): 4f7e43ef-d28a-29bd-f933-68f5a8f36241
For each interface, you need to take the UUID (the one at the top labeled uuid ( RO)) and insert it in the xe vif-param-set uuid=xxx other-config:ethtool-tx="off" command. So for our two virtual interfaces the commands to run would look like this:
xe vif-param-set uuid=789358b4-54c8-87d3-bfb3-0b7721e4661b other-config:ethtool-tx="off"
xe vif-param-set uuid=a9380705-8da2-4bf7-bbb0-f167d8f0d645 other-config:ethtool-tx="off"
That's it! For this to take effect you need to fully shut down the VM then power it back on. Then you are good to go!
TIP
If you ever add more virtual NICs to your VM, you will need to go back and do the same steps for these interfaces as well.
# XCP-ng in a VM
This page details how to install XCP-ng as a guest VM inside different hypervisors to test the solution before a bare-metal installation.
WARNING
This practice is not recommended for production, nested virtualization has only tests/labs purpose.
Here is the list of hypervisors on which you can try XCP-ng :
- XCP-ng (opens new window)
- VMware ESXi & Workstation (opens new window)
- Hyper-V 2016 (opens new window)
- QEMU/KVM (opens new window)
- Virtualbox (opens new window) (Nested Virtualisation implemented only in v6.1.x and above - https://www.virtualbox.org/ticket/4032 (opens new window))
# Nested XCP-ng using XCP-ng
- create a new VM from CentOS 7 template with minimum 2 vCPU and 4GB RAM
- change disk size to 100GB
- enable nested virtualisation with the special command on CLI:
xe vm-param-set uuid=<UUID> platform:exp-nested-hvm=true - default NIC type of Realtek may create stability issue for nested XCP-NG, change it to Intel e1000 :
xe vm-param-set uuid=<UUID> platform:nic_type="e1000" - install/use it like normal 😃
# Nested XCP-ng using Xen
It's a pretty standard HVM, but you need to use a vif of ioemu type. Check this configuration example:
builder='hvm'
memory = 4096
name = 'xcp-ng'
vcpus=6
pae=1
acpi=1
apic=1
vif = [ 'mac=xx:xx:xx:xx:xx:xx,type=ioemu,bridge=virbr0' ]
disk = [ 'file:/foo/bar/xcp-ng.img,hdc,w', 'file:/foo/bar/xcp-ng/xcp-ng-8.1.0-2.iso,hdb:cdrom,r' ]
boot='dc'
vnc=1
serial='pty'
tsc_mode='default'
viridian=0
usb=1
usbdevice='tablet'
gfx_passthru=0
localtime=1
xen_platform_pci=1
pci_power_mgmt=1
stdvga = 0
serial = 'pty'
hap=1
nestedhvm=1
on_poweroff = 'destroy'
on_reboot   = 'destroy'
on_crash    = 'destroy'
# Nested XCP-ng using VMware (ESXi and Workstation)
The following steps can be performed under VMware Workstation Pro, the settings will remain the same but the configuration will be slightly different. We will discuss this point at the end of this section about VMware.
# Networking settings
The first step, and without a doubt the most important step, will be to modify the virtual network configuration of our ESXi host. Without this configuration, the network will not work for your virtual machines running on your nested XCP-ng.
Start by going to the network settings of your ESXi host.

Then select the port group on which your XCP-ng virtual machine will be connected. By default, this concerns the vSwitch0 and the 'VM Network' group port.
Click on the "Edit Settings" button to edit the parameters of this port group.
Here is the default settings :

Click on the Accept checkbox for Promiscuous mode.
Save this settings by using the Save button at the bottom of the window.
A little explanation from the VMware documentation website : Promiscuous mode under VMware ESXi (opens new window)
These settings can be done at the vSwitch itself (same configuration menu). By default, the group port inherits the vSwitch settings on which it is configured. It all depends on the network configuration you want to accomplish on your host.
# XCP-ng virtual machine settings
Once your host's network is set up, we'll look at configuring the XCP-ng virtual machine.
Create a virtual machine and move to the "Customize settings" section. Here a possible virtual machine configuration :

Then edit the CPU settings and check the "Expose hardware assisted virtualization to the guest OS" box in the "Hardware Virtualization" line.

Enable virtualized CPU performance counters can be checked if necessary : VMware CPU Performance Counters (opens new window)
For the other virtual machine settings, some explanations :
- Dual CPU sockets for improving vCPU performance.
- The virtual disk must be at least 60 GB in size to install XCP-ng !
- LSI Logic SAS controller is chosen to maximize at possible the compatibility and the performance. vNVMe controller works too, it can reduce CPU overhead and latency. PVSCSI controller won't work.
- Unlike the PVSCSI controller, the VMXNET3 controller works with XCP-ng. It will be useful if heavy network loads are planned between different XCP-ng virtual machines (XOSAN)
Finally, install XCP-ng as usual, everything should work as expected. After installation, your XCP-ng virtual machine is manageable from XCP-ng Center or Xen Orchestra.

You can then create a virtual machine and test how it works (network especially).
# Configuration under VMware Workstation Pro 14/15
Create a XCP-ng virtual machine like in ESXi.
Check the following CPU setting : Virtualize Intel VT-x/EPT or AMD-V/RVI

An additional option is to be added to the virtual machine's .vmx file. You will also add the option to enable promiscuous mode for the virtual machine.
hypervisor.cpuid.v0 = "FALSE" : Addition to the checked CPU option on Workstation ethernet0.noPromisc = "FALSE" : Enable Promiscuous Mode
Be careful, 'ethernet0' is the name of the bridged network interface of my virtual machine, remember to check that it's the same name in your .vmx file (search the 'ethernet' string using your favorite text editor).
If you want to use the VMXNET3 card, this is possible. For this you must also modify the .vmx file of your XCP-ng virtual machine.
Replace ethernet0.virtualDev = "e1000" by ethernet0.virtualDev = "vmxnet3"
Check if the virtual machine correctly works by trying to connect using XCP-ng Center and by creating a virtual machine on your nested XCP-ng.
# Nested XCP-ng using Microsoft Hyper-V (Windows 10 - Windows Server 2016)
The following steps can be performed with Hyper-V on Windows 10 (version 1607 minimum) and Windows Server 2016 (Hyper-V Server also). The settings will remain the same for both OS.
This feature is not available with Windows 8 and Windows Server 2012/2012 R2 AND an Intel CPU is required (AMD not supported yet).
Unlike VMware, you must first create the virtual machine to configure nested virtualization. Indeed, under Hyper-V, the configuration of the nested virtualization is a parameter to be applied to the virtual machine, it is not a global configuration of the hypervisor.
# XCP-ng virtual machine settings
The configuration of the virtual machine uses legacy components. Indeed XenServer / XCP-ng does not have the necessary drivers to work on a "modern" Hyper-V virtual hardware . The consequences are that the performance of this XCP-ng virtual machine will be poor.
The VM settings :
- VM Generation : 1 (even if the latest versions of CentOS work in Gen 2)
- Memory : 4GB minimum
- Disk Controller : IDE
- Dynamic Memory : Disabled (even if activated, the hypervisor will disable it in case of nested virtualization)
- Network Controller : Legacy Network Card
# CPU and Network settings
Once the virtual machine is created, it is possible to enable nested virtualization for this virtual machine. Open a PowerShell Administrator prompt :
Set-VMProcessor -VMName <Your XCP-ng VM name> -ExposeVirtualizationExtensions $trueThen, it will be about configuring the network to allow guest virtual machines to access to the outside network.
Get-VMNetworkAdapter -VMName <Your XCP-ng VM name> | Set-VMNetworkAdapter -MacAddressSpoofing OnImportant : This settings has to be applied even if you use the NAT Default Switch (since Windows 10 1709)
After these configurations, you should be able to manage this XCP-ng host from XCP-ng Center or from a Xen Orchestra instance.

# Nested XCP-ng using QEMU/KVM
The following steps can be performed using QEMU/KVM on a Linux host, Proxmox or oVirt.
Like VMware, you must first enable the nested virtualization feature on your host before creating your XCP-ng virtual machine.
# Configure KVM nested virtualization (Intel)
Check if your CPU support virtualization and EPT (Intel)
On most Linux distributions :
egrep -wo 'vmx|ept' /proc/cpuinfoEPT is required to run nested XS/XCP-ng : https://xcp-ng.org/forum/topic/550/shadow-paging-disable (opens new window)
If everything is OK, you can check if the nested virtualization is already activated.
$ cat /sys/module/kvm_intel/parameters/nestedIf the command returns "Y", nested virtualization is activated, if not, you should activate it (next steps).
Firstly, check if you don't have any virtual machine running. Then, unload the KVM module using root user or sudo :
# modprobe -r kvm_intelActivate nested virtualization feature :
# modprobe kvm_intel nested=1Nested virtualization is enabled until the host is rebooted. To enable it permanently, add the following line to the
/etc/modprobe.d/kvm.conffile:options kvm_intel nested=1
# Configure KVM nested virtualization (AMD)
On recent kernels, when enabling AMD virtualization in the BIOS, it should enable nested virtualization without any further configuration. Verify that cat /sys/module/kvm_amd/parameters/nested returns 1.
# XCP-ng virtual machine settings
The configuration of the virtual machine will use mostly emulated components for disks and network. VirtIO drivers are not include in the XS/XCP-ng kernel.
The VM settings :
- CPU configuration : host-model or host-passthrough (mandatory, prefer host-passthrough)
- Boot loader: use BIOS rather than UEFI. The installation may complete successfully but it may not boot up.
- Memory : 4GB minimum / 8GB recommended
- Disk Controller : LSI Logic SCSI
- Disk: at least 50GiB
- Network : E1000
Finally, install/use XCP-ng !

# VLAN Trunking in a VM
This document will describe how to configure a VLAN trunk port for use in a VM running on xcp-ng. The typical use case for this is you want to run your network's router as a VM and your network has multiple vlans.
With some help from others in the forums (opens new window), I was able to get a satisfactory solution implemented using pfSense (opens new window) and so this document will discuss how to implement this solution using pfSense as your router. In theory, the same solution should apply to other router solutions, but it is untested. Feel free to update this document with your results.
# Two Approaches
There are two approaches to vlans in xcp-ng. The first is to create a vif for each VLAN you want your router to route traffic for then attach the vif to your VM. The second is to pass through a trunk port from dom0 onto your router VM.
# Multiple VIFs
By far, this is the easiest solution and perhaps the "officially supported" approach for xcp-ng. When you do this, dom0 handles all the VLAN tagging for you and each vif is just presented to your router VM as a separate virtual network interface. It's like you have a bunch of separate network cards installed on your router where each represents a different VLAN and is essentially attached to a VLAN access (untagged) port on your switch. There is nothing special for you to do, this just works. If you require 7 vifs or less for your router then this might be the easiest approach.
The problem with this approach is when you have many vlans you want to configure on your router. If you read through the thread I linked to at the top of this page you'll notice the discussion about where I was unable to attach more than 7 vifs to my pfSense VM. XO nor XCP-ng Center allow you to attach more than seven. This appears to be some kind of limit somewhere in Xen. Other users have been able to attach more than 7 vifs via CLI, however when I tried to do this myself my pfSense VM became unresponsive once I added the 8th vif. More details on that problem are discussed in the thread.
Another problem with this approach, perhaps only specific to pfSense, is that when you attach many vifs, you must disable TX offloading on each and every vif otherwise you'll have all kinds of problems. This was definitely a red flag for me. Initially I'm starting with 7 vlans and 9 networks total with short term requirements for at least another 3 vlans for sure and then who knows how many down the road. In this approach, every time you have to create a new VLAN by adding a vif to the VM, you will have to reboot the VM.
Having to reboot my network's router every time I need to create a new VLAN is not ideal for the environment I'm working in; especially because in the current production environment running VMware, we do not need to reboot the router VM to create new vlans. (FWIW, I've come to xcp-ng as the IT department has asked me to investigate possibly replacing our VMware env with XCP-ng. I started my adventures with xcp-ng by diving in head first at home and replacing my home environment, previously ESXi, with xcp-ng. Now I'm in the early phases of working with xcp-ng in the test lab at work.)
In conclusion, if you have seven or fewer vifs and you're fairly confident that you'll never need to exceed seven vifs then this approach is probably the path of least resistance. On the other hand, if you know you'll need more than seven or fairly certain you will some day. Or you're in an environment where you need to be able to create vlans on the fly then you'll probably want to proceed with the alternative below.
This document is about the alternative approach, but a quick summary of how this solution works in xcp-ng:
- Make sure the pif connected to your xcp-ng server is carrying all the required tagged vlans
- Within XO or XCP Center, create multiple networks off of the pif, adding the VLAN tag as needed for each VLAN
- For each VLAN you want your router to route for, add a vif for that specific VLAN to the VM
- For pfSense, disable TX offloading for each vif added and reboot the VM. This page (opens new window) will fully explain all of the config changes required when running pfSense in xcp-ng.
# Adding VLAN Trunk to VM
The alternative approach involves attaching the VLAN trunk port directly to your router VM, and handling the VLANs in pfSense directly. This has the biggest advantage of not requiring a VM reboot each time you need to setup a new VLAN. However note you will need to manually edit a configuration file in pfSense every time it is upgraded. The physical interface you are using to trunk VLANs into the pfSense VM should also not be the same physical interface that your xcp-ng management interface is on. This is because one of the steps required is setting the physical interface MTU to 1504, and this will potentially cause MTU mismatches if xen is using this same physical interface for management traffic (1504-byte sized packets being sent from the xen management interface to your MTU 1500 network).
The problem we face with this solution is that, at least in pfSense, the xn driver used for the paravirtualization in FreeBSD does not support 802.1q tagging. So we have to account for this ourselves both in dom0 and in the pfSense VM. Once you're aware of this limitation, it actually isn't a big deal to get it all working but it just never occurred to me that a presumably relatively modern network driver would not support 802.1q.
Anyway, the first step is to modify the MTU setting of the pif that is carrying your tagged vlans into the xcp-ng server from 1500 to 1504. The extra 4 bytes is, of course, the size of the VLAN tagging within each frame. Warning: You're going to have to detach or shutdown any VMs that are currently using this interface. For this example, let's say it's eth1 that is the pif carrying all our tagged traffic.
- List all your networks
xe network-list
- Set MTU on the relevant network(s)
xe network-param-set uuid=xxx MTU=1504
- Reboot your XCP-ng host to apply the MTU change on the physical network cards
Once this is done, attach a new vif to your pfSense VM and select eth1 as the network. This will attach the VLAN trunk to pfSense. Boot up pfSense and disable TX offloading, etc. on the vif, reboot as necessary then login to pfSense.
Configure the interface within pfSense by also increasing the MTU value to 1504. Again, the xn driver does not support VLAN tagging, so we have to deal with it ourselves. NOTE: You only increase the MTU on the parent interface only in both xcp-ng and pfSense. The MTU for vlans will always be 1500.
Finally, along the same lines, since the xn driver does not support 802.1q, pfSense will not allow you to create vlans on any interface using the xn driver. We have to modify pfSense to allow us to do this.
From a shell in pfSense, edit /etc/inc/interfaces.inc and modify the is_jumbo_capable function at around line 6761. Edit it so it reads like so:
function is_jumbo_capable($iface) {
        $iface = trim($iface);
        $capable = pfSense_get_interface_addresses($iface);

        if (isset($capable['caps']['vlanmtu'])) {
                return true;
        }

        // hack for some lagg modes missing vlanmtu, but work fine w/VLANs
        if (substr($iface, 0, 4) == "lagg") {
                return true;
        }

        // hack for Xen xn interfaces
        if (substr($iface, 0, 2) == "xn")
                return true;

        return false;
}
TIP
This modification is based on pfSense 2.4.4p1, ymmv. However, I copied this mod from here (opens new window), which was based on pfSense 2.3.x, so this code doesn't change often.
Keep in mind that you will need to reapply this mod anytime you upgrade pfSense.
That's it, you're good to go! Go to your interfaces > assignments in pfSense, select the VLANs tab and create your vlans. Everything should work as expected.
# Links/References
- Forums: My initial question and discussion about VLAN trunk support (opens new window)
- pfSense interface does not support VLANs (opens new window)
- pfSense: Adding VLAN support for Xen xn interfaces (opens new window)
# TLS certificate for XCP-ng
After installing XCP-ng, access to xapi via XCP-ng Center or XenOrchestra is protected by TLS with a self-signed certificate (opens new window): this means that you have to either verify the certificate signature before allowing the connection (comparing against signature shown on the console of the server), either work on trust-on-first-use basis (i.e. assume that the first time you connect to the server, nobody is tampering with the connection).
If you would like to replace this certificate by a valid one, either from an internal Certificate Authority or from a public one, you'll find here some indications on how to do that.
Note that if you use an non-public certificate authority and XenOrchestra, you have additional configuration to specify on XenOrchestra side (opens new window).
# Generate certificate signing request
You can use the auto-generated key to create a certificate signing request:
openssl req -new -key /etc/xensource/xapi-ssl.pem -subj '/CN=XCP-ng hypervisor/' -out xcp-ng.csr
# Install the certificate chain (for XCP-ng v8.2+)
Once you have your certificates, upload the certificates to your XCP-ng host, then use the following command to install the certificates:
xe host-server-certificate-install certificate=<path to certificate> private-key=<path to key> certificate-chain=<path to chain>
TIP
The certificate-chain parameter is optional. The private key can be deleted after certificate is installed for additional security. For additional details check Citrix documentation (opens new window).
Done! Visit your XCP-ng host ip using a browser and validate the certificate is correct.
# Install the certificate chain (for XCP-ng up to v8.1)
The certificate, intermediate certificates (if needed), certificate authority and private key are stored in /etc/xensource/xapi-ssl.pem, in that order. You have to replace all lines before -----BEGIN RSA PRIVATE KEY---- with the certificate and the chain you got from your provider, using your favorite editor (nano is present on XCP-ng by default).
Then, you have to restart xapi :
systemctl restart xapi
# Dom0 memory
TIP
Dom0 is another word to talk about the privileged domain, also known as the Control Domain.
Issues can arise when the control domain is lacking memory, that's why we advise to be generous with it whenever possible. Default values from the installer may be too low for your setup. In general it depends on the amount of VM's and their workload. If constraints do not allow you to follow the advice below, you can try to set lower values.
In any case:
- monitor RAM usage in the control domain
- if issues arise (failed live migration for example), [look at the logs for messages related to lack of memory
# Recommended values
- we advise to give at least 2GiB of RAM for Dom0. Below that your XCP-ng may experience performance issues or other weird errors.
- up to 64GiB RAM on your machine, at least 4GiB RAM for Dom0
- an host with 128GiB or more should use 8GiB RAM for Dom0
WARNING
Note: If you use ZFS, assign at least 16GB RAM to avoid swapping. ZFS (in standard configuration) uses half the Dom0 RAM as cache!
# Current RAM usage
You can use htop to see how much RAM is currently used in the dom0. Alternatively, you can have Netdata to show you past values.
# Change dom0 memory
Example with 4 GiB:
/opt/xensource/libexec/xen-cmdline --set-xen dom0_mem=4096M,max:4096M
Do not mess the units and make sure to set the same value as base value and as max value.
Reboot to apply.
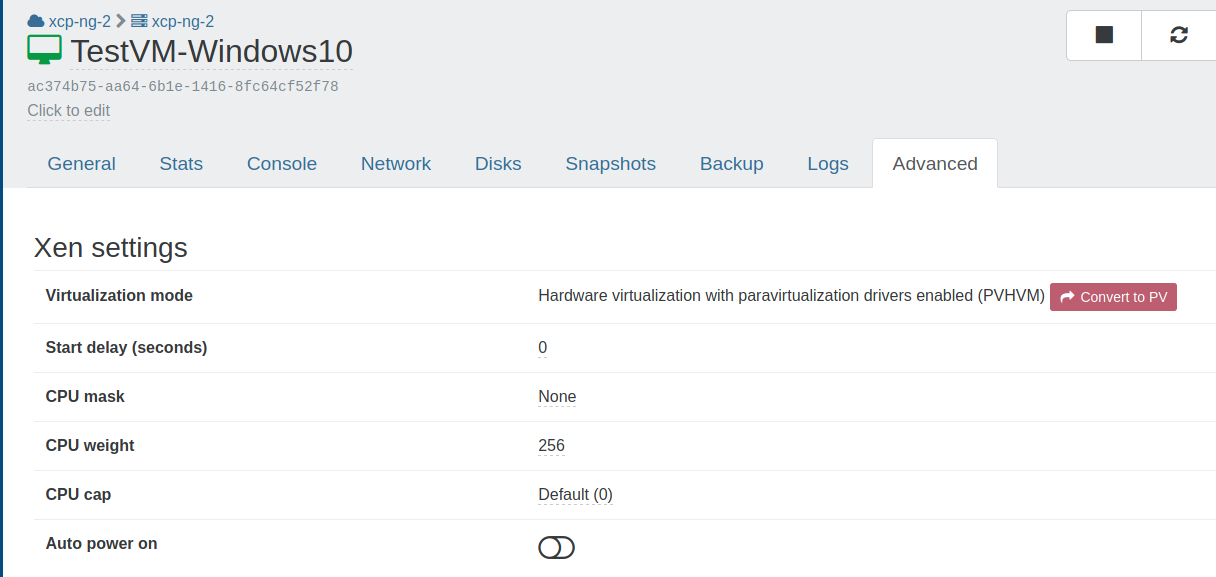
# Autostart VM on boot
A VM can be started at XCP-ng boot itself, it's called Auto power on. We have two ways to configure it: using Xen Orchestra or via the CLI.
# With Xen Orchestra
In Xen Orchestra we can just enable a toggle in VM "Advanced" view, called Auto power on. Everything will be set accordingly.
# With the CLI
- Determine the UUID of the pool for which we want to enable Auto Start. To do this, run the console command on the server:
# xe pool-list
uuid ( RO) : <VM_UUID>
- Allow autostart of virtual machines at the pool level with the found UUID command:
# xe pool-param-set uuid=<VM_UUID> other-config:auto_poweron=true
Now we enable autostart at the virtual machine level. 3. Execute the command to get the UUID of the virtual machine:
# xe vm-list
    uuid ( RO)           : <VM_UUID>
    name-label ( RW)     : VM
    power-state ( RO)    : running
Enable autostart for each virtual machine with the UUID found:
# xe vm-param-set uuid=<VM_UUID> other-config:auto_poweron=trueChecking the output
# xe vm-param-list uuid=<VM_UUID> | grep other-config
# Software RAID Storage Repository
XCP-ng has support for creating a software RAID for the operating system but it is limited to RAID level 1 (mirrored drives) and by the size of the drives used. It is strictly intended for hardware redundancy and doesn't provide any additional storage beyond what a single drive provides.
These instructions describe how to add more storage to XCP-ng using software RAID and show measures that need to be taken to avoid problems that may happen when booting. You should read through these instructions at least once to become familiar with them before proceeding and to evaluate whether the process fits your needs. Look at the "Troubleshooting" section of these instructions to get some idea of the kinds of problems that can happen.
An example installation is described below using a newly installed XCP-ng software RAID system. This covers only one specific possibility for software RAID. See the "More and Different" section of these instructions to see other possibilities.
In addition, the example presented below is a fresh installation and not being installed onto a production system. The changes described in the instructions can be applied to a production system but, as with any system changes, there is always a risk of something going badly and having some data loss. If performing this on a production system, make sure that there are good backups of all VMs and other data on the system that can be restored to this system or even a different one in case of problems.
These instructions assume you are starting with a server already installed with software RAID and have no other storage repositories defined except what may be on the existing RAID.
# Example System
The example system we're demonstrating here is a small server using 5 identical 1TB hard drives. XCP-ng has already been installed in a software RAID configuration using 2 of the 5 drives. There is already a default "Local storage" repository configured as part of the XCP-ng setup on the existing RAID 1 drive pair.
Before starting the installation, all partitions were removed from the drives and the drives were overwritten with zeroes.
So before starting out, here is an overview of the already configured system:
[09:51 XCP-ng ~]# cat /proc/partitions
major minor  #blocks  name

   8        0  976762584 sda
   8       16  976762584 sdb
   8       32  976762584 sdc
   8       64  976762584 sde
   8       48  976762584 sdd
   9      127  976762432 md127
 259        0   18874368 md127p1
 259        1   18874368 md127p2
 259        2  933245487 md127p3
 259        3     524288 md127p4
 259        4    4194304 md127p5
 259        5    1048576 md127p6
 252        0  933232640 dm-0

[09:51 XCP-ng ~]# cat /proc/mdstat
Personalities : [raid1]
md127 : active raid1 sdb[1] sda[0]
      976762432 blocks super 1.0 [2/2] [UU]
      bitmap: 1/8 pages [4KB], 65536KB chunk

unused devices: <none>
The 5 drives are in place as sda through sde and as can be seen from the list are exactly the same size. The RAID 1 drive pair is set up as the XCP-ng default of a partitioned RAID 1 array md127 using drives sda and sdb and is in a healthy state.
# Building the Second RAID
We have 3 remaining identical drives, sdc, sdd, and sde and we're going to create a RAID 5 array using them in order to maximize the amount of space. We'll create this using the mdadm command like this:
[10:02 XCP-ng ~]# mdadm --create /dev/md0 --run --level=5 --bitmap=internal --assume-clean --raid-devices=3 --metadata=1.2 /dev/sdc /dev/sdd /dev/sde
mdadm: array /dev/md0 started.
Here, we've made sure to use the assume-clean and metadata=1.2 options. The assume-clean option prevents the RAID assembly process from initializing the content of the parity blocks on the drives which saves a lot of time when assembling the RAID for the first time.
The metadata=1.2 option forces the RAID array metadata to a position close to the beginning of each drive in the array. This is most important for RAID 1 arrays but useful for others and prevents the component drives of the RAID array from being confused for separate individual drives by any process that tries to examine the drives for automatic mounting or other use.
Checking the status of the drives in the system should show the newly added RAID array.
[10:20 XCP-ng ~]# cat /proc/partitions
major minor  #blocks  name

   8        0  976762584 sda
   8       16  976762584 sdb
   8       32  976762584 sdc
   8       64  976762584 sde
   8       48  976762584 sdd
   9      127  976762432 md127
 259        0   18874368 md127p1
 259        1   18874368 md127p2
 259        2  933245487 md127p3
 259        3     524288 md127p4
 259        4    4194304 md127p5
 259        5    1048576 md127p6
 252        0  933232640 dm-0
   9        0 1953260544 md0
[10:39 XCP-ng ~]# cat /proc/mdstat
Personalities : [raid1] [raid6] [raid5] [raid4]
md0 : active raid5 sde[2] sdd[1] sdc[0]
      1953260544 blocks super 1.2 level 5, 512k chunk, algorithm 2 [3/3] [UUU]
      bitmap: 0/8 pages [0KB], 65536KB chunk

md127 : active raid1 sdb[1] sda[0]
      976762432 blocks super 1.0 [2/2] [UU]
      bitmap: 1/8 pages [4KB], 65536KB chunk

unused devices: <none>
Here we can see that the new RAID 5 array is in place as array md0, is using drives sdc, sdd, and sde and is healthy. As expected for a 3 drive RAID 5 array, it is providing about twice as much available space as a single drive.
# Building the Storage Repository
Now we create a new storage repository on the new RAID array like this:
[11:21 XCP-ng ~]# xe sr-create name-label="RAID storage" type=ext device-config:device=/dev/md0 shared=false content-type=user
2acc2807-1c44-a757-0b79-3834dbcf1a79
What we have now is a second storage repository named "RAID storage" using thin-provisioned EXT filesystem storage. It will show up and can be used within Xen Orchestra or XCP-ng Center and should behave like any other storage repository.
At this point, we'd expect that the system could just be used as is, virtual machines stored in the new RAID storage repository and that we can normally shut down and restart the system and expect things to work smoothly.
Unfortunately, we'd be wrong.
# Unstable RAID Arrays When Booting
What really happens when XCP-ng boots with a software RAID is that code in the Linux kernel and in the initrd file will attempt to find and automatically assemble any RAID arrays in the system. When there is just the single md127 RAID 1 array, the process works pretty well. Unfortunately, the system seems to occasionally break down where there are more drives, more arrays, and more complex arrays.
This causes several problems in the system, mainly due to the system not correctly finding and adding all component drives to each array or not starting arrays which do not have all components added but could otherwise start successfully.
A good example here would be the md0 RAID 5 array we just created. Rebooting the system in the state it is in now will often or even usually work without problems. The system will find both drives of the md127 RAID 1 boot array and all three drives of the md0 RAID 5 storage array, assemble the arrays and start them running.
Sometimes what happens is that the system either does not find all of the parts of the RAID or does not assemble them correctly or does not start the array. When that happens the md0 storage array will not start and looking at the /proc/mdstat array status will show the array as missing one or two of the three drives or will show all three drives but not show them as running. Another common problem is that the array is assembled with enough drives to run, two out of three drives in our case, but does not start. This can also happen if the array has a failed drive at boot even if there are enough remaining drives to start and run the array.
This can also happen to the md127 boot array where it will show with only one of the two drives in place and running. If it does not start and run at all, we will fail to get a normal boot of the system and likely be tossed into an emergency shell instead of the normal boot process. This is usually not consistent and another reboot will start the system. This can even happen when the boot RAID is the only RAID array in the system but fortunately that rarely happens.
So what can we do about this? Fortunately, we can give the system more information about what RAID arrays are in the system and specify that they should be started up at boot.
# Stabilizing the RAID Boot Configuration: The mdadm.conf File
The first thing we need to do is give the system more information on what RAID arrays exist and how they're put together. The way to do this is by creating a raid configuration file /etc/mdadm.conf.
The mdadm.conf file created for this system is here:
[13:02 XCP-ng ~]# cat /etc/mdadm.conf
AUTO +all
MAILADDR root
DEVICE /dev/sda /dev/sdb /dev/sdc /dev/sdd /dev/sde
ARRAY /dev/md0  metadata=1.2 UUID=53461f34:2414371e:820f9514:008b6458
ARRAY /dev/md127  metadata=1.0 UUID=09871a29:26fa7ce1:0c9b040a:60f5cabf
Each system and array will have different UUID identifiers so the numbers we have here are specific to this example. The UUID identifiers here will not work for another system. For each system, we'll need a way to get them to include in the mdadm.conf file. The best way is using the mdadm command itself while the arrays are running like this:
[13:06 XCP-ng ~]# mdadm --examine --scan
ARRAY /dev/md/0  metadata=1.2 UUID=53461f34:2414371e:820f9514:008b6458 name=XCP-ng:0
ARRAY /dev/md/127  metadata=1.0 UUID=09871a29:26fa7ce1:0c9b040a:60f5cabf name=localhost:127
Notice that this is output in almost exactly the same format as shown in the mdadm.conf file above. The UUID numbers are important and we'll need them again later.
If we don't want to type in the entire file, we can create the file like this.
echo 'AUTO +all' > /etc/mdadm.conf
echo 'MAILADDR root' >> /etc/mdadm.conf
echo 'DEVICE /dev/sda /dev/sdb /dev/sdc /dev/sdd /dev/sde' >> /etc/mdadm.conf
mdadm --examine --scan >> /etc/mdadm.conf
And then edit the file to change the format of the array names from /dev/md/0 to /dev/md0 and remove the name= parameters from each line. This isn't strictly necessary but keeps the array names in the file consistent with what is reported in /proc/mdstat and /proc/partitions and avoids giving each array another name (in our case those names would be localhost:127 and XCP-ng:0).
So what do these lines do? The first line instructs the system to allow or attempt automatic assembly for all arrays defined in the file. The second specifies to report errors in the system by email to the root user. The third is a list of all drives in the system participating in RAID arrays. Not all drives need to be specified on a single DEVICE line. Drives can be split among multiple lines and we could even have one DEVICE line for each drive. The last two are descriptions of each array in the system.
This file gives the system a description of what arrays are configured in the system and what drives are used to create them but doesn't specify what to do with them. The system should be able to use this information at boot for automatic assembly of the arrays. Booting with the mdadm.conf file in place is more reliable but still runs into same problems as before.
# Stabilizing the RAID Boot Configuration: The initrd Configuration
The other thing we need to do is give the system some idea of what to do with the RAID arrays at boot time. The way to do this is by adding instructions for the dracut program creating the initrd file to enable all RAID support, use the mdadm.conf file we created, and to start the arrays at boot time.
We can specify additional command line parameters to the dracut command which creates the initrd file to ensure that kernel RAID modules are loaded, the mdadm.conf file is used and so on but there are a lot of them. In addition, we would have to manually specify the command line parameters every time a new initrd file is built or rebuilt. Any time dracut is run any other way such as automatically as part of applying a kernel update, the changes specified manually on the command line would be lost. A better way to do it is to create a list of parameters that will be used automatically by dracut every time it is run to create a new initrd file.
The dracut command keeps its configuration in the file /etc/dracut.conf and commands in the file are used when creating the initrd file every time the dracut command is run. We could make changes in that file but that comes with its own problems. There is no good way to prevent any other changes in the file from replacing our added commands such as installing an update which affects dracut.
Instead of changing the main configuration file, we can have a file with only added commands for dracut. The place to create the file is in the folder /etc/dracut.conf.d/. Any file with commands in that folder will be read and used by dracut when creating a new initrd file. XCP-ng already creates several files in that folder that affect how the initrd file is created but we should avoid changing those files for the same reasons as avoiding changes to the main configuration file. Keeping the configuration changes we need in their own file should ensure that our changes won't be lost or changed. The added file will also be used every time dracut creates a new initrd file whether it is done manually at the command line or automatically by an update.
We create a new file dracut_mdraid.conf in that folder that looks like this:
[14:11 XCP-ng ~]# cat /etc/dracut.conf.d/dracut_mdraid.conf
mdadmconf="yes"
use_fstab="yes"
add_dracutmodules+=" mdraid "
add_drivers+=" md_mod raid0 raid1 raid456 raid10 "
add_device+=" /dev/md0 "
add_device+=" /dev/md127 "
kernel_cmdline+=" rd.auto=1 "
kernel_cmdline+=" rd.md=1 "
kernel_cmdline+=" rd.md.conf=1 "
kernel_cmdline+=" rd.md.uuid=53461f34:2414371e:820f9514:008b6458 "
kernel_cmdline+=" rd.md.uuid=09871a29:26fa7ce1:0c9b040a:60f5cabf "
This file contains two sets of instructions for dracut, some that affect how the initrd file is built and what is done at boot and the rest which are passed to the Linux kernel at boot.
The first set instructs dracut to consider the mdadm.conf file we created earlier and also to include a copy of it in the initrd file, add dracut support for mdraid, include the kernel modules for mdraid support, and specifically support the two RAID devices by name.
The second set instructs the booting Linux kernel to support automatic RAID assembly, support mdraid and the mdraid configuration and also to search for and start the two RAID arrays via their UUID identifiers. These are the same UUID identifiers that we included in the mdadm.conf file and, like the UUID identifiers there, are specific to each array and system.
Something to note when creating the file is to allow extra space between command line parameters. That is why most of the lines have extra space before and after parameters within the quotes.
# Building and Testing the New initrd File
Now that we have all of this extra configuration, we need to get the system to include it for use at boot. To do that we use the dracut command to create a new initrd file like this:
dracut --force -M /boot/initrd-$(uname -r).img $(uname -r)
This creates a new initrd file with the correct name matching the name of the Linux kernel and prints a list of modules included in the initrd file. Printing the list isn't necessary but is handy to see that dracut is making progress as it runs.
When the system returns to the command line, it's time to test. We'll reboot the system from the console or from within Xen Orchestra or XCP-ng Center. If all goes well, the system should boot normally and correctly find and mount all 5 drives into the two RAID arrays. The easiest way to tell that is looking at the /proc/mdstat file.
[14:36 XCP-ng ~]# cat /proc/mdstat
Personalities : [raid1] [raid6] [raid5] [raid4]
md127 : active raid1 sda[0] sdb[1]
      976762432 blocks super 1.0 [2/2] [UU]
      bitmap: 1/8 pages [4KB], 65536KB chunk

md0 : active raid5 sdc[0] sde[2] sdd[1]
      1953260544 blocks super 1.2 level 5, 512k chunk, algorithm 2 [3/3] [UUU]
      bitmap: 3/8 pages [12KB], 65536KB chunk

unused devices: <none>
We can see that both arrays are active and healthy with all drives accounted for. Examining the storage repositories using Xen Orchestra, XCP-ng, or xe commands shows that both the Local storage and RAID storage repositories are available.
# Troubleshooting
The most common problems in this process stem from one of a few things.
One common cause of problems is using the wrong type of drives. Just like when using drives for installation of XCP-ng, it is important to use drives that either have or emulate 512 byte disk sectors. Drives that use 4K byte disk blocks will not work unless they are 512e disks which emulate having 512 byte sectors. It is generally not a good idea to mix types of drives such as one 512n (native 512 byte sectors) and two 512e drives but should be possible to do in an emergency.
The second is that the drives were not empty before including them into the system. If there are any traces of RAID configuration or file systems on the drives, we could have problems with interference between those and the new configurations we're creating on the drives when creating the RAID array or the EXT filesystem (or LVM if you use that for the storage array).
The way to avoid this problem is to make sure the drives are thoroughly wiped before starting the process. This can be done from the command line with the dd command like this:
dd if=/dev/zero of=/dev/sde bs=1M
This writes zeroes to every block on the drive and will wipe any traces of previous filesystems or RAID configurations.
Sometimes only one drive has a problem when assembling the RAID and we'll see a working RAID with one drive missing. We'll assume that our md0 RAID was assembled correctly except that it is missing drive /dev/sde. In that case, it should be possible to add the missing drive into the array like this:
mdadm --add /dev/md0 /dev/sde
If the drive is added to the RAID array correctly, we should start to see a lot of disk activity and we should be able to monitor the progress of it by looking at the /proc/mdstat file.
If the drive will not add to the array due to something left over on the drive, we should get an error from mdadm indicating the problem. In that case we should be able to use the dd command to wipe out the one drive as above and then attempt to add it into the array.
The other possibility is that the RAID array is created correctly but XCP-ng will not create a storage repository on it because some previous content of the drives is causing a problem. It should be possible to recover from this by writing zeroes to the entire array without needing to rebuild it like this:
dd if=/dev/zero of=/dev/md0 bs=1M
After the probably very lengthy process of zeroing out the array, it should be possible to try again to create a storage repository on the RAID array.
Another common cause for problems is a problem with either the mdadm.conf or dracut_mdraid.conf files. Often when there is a problem with one of those files, the system will boot but fail to assemble or start the RAID arrays. The boot RAID array will usually be found and assembled automatically but other RAID arrays may not.
The best thing to do in this case is to check over the contents of the mdadm.conf and dracut_mdraid.conf files. Look for mistyped or missing quotes in the dracut_mdraid.conf or missing spaces inside the quotes for those lines that have them. Look for incorrect or mistyped UUID identifiers for the RAID arrays in both files. The UUID identifiers should match the identifiers you get using the mdadm --examine --scan command and also match between the mdadm.conf file and the dracut_mdraid.conf file. If any errors are found and corrected, rebuild the initrd file using the dracut command.
In an extreme case, it should even be possible to delete and re-create those files using the normal instructions and rebuild the initrd file again. It should also be possible but slightly more risky to remove the files and re-create the initrd file then reboot and attempt to re-create the files and initrd again after rebooting.
Another possible but rare problem is caused by drives that shift their identifications from one system boot to the next. A drive that has one name such as sdf on one boot might be different such as sdc on a different boot. This is usually due to problems with the system BIOS or drivers and can also be caused by some hardware problems such as a drive taking wildly different amounts of time to start up from one boot to the next. It it also more common with some types of storage such as NVMe storage.
This type of problem is very difficult to diagnose and correct. It may be possible to resolve it using different BIOS or setup configurations in the host system or by updating BIOS or controller firmware.
# Updates and Upgrades
We will eventually need to update or patch the system to fix problems or close security holes as they are discovered.
Updates are patches that are applied to isolated parts of the system and replace or correct just the affected programs or data files. The patches are applied using the yum command from the host system's command line or via the Xen Orchestra patches tab for a host or pool. The individual update patches should not affect either the added mdadm.conf or dracut_mdraid.conf files and any rebuild of the initrd file as part of a Linux kernel update should use the configuration from those files. In general, updates should be safe to apply without risk of affecting software RAID operation.
Upgrades made by booting from CD or the equivalent via network booting are different from updates. The upgrade process replaces the entire running system by creating a backup copy of the current system into a separate disk partition then performing a full installation from the CD and makes copies of the configuration data and files from the previous system, upgrading them as needed. As part of a full upgrade, it is likely that one or both of the added RAID configuration files will not be copied from the original system to the upgraded system.
Before installing an upgrade via CD, check the running RAID arrays and look for any problems with drives as follows:
[09:46 XCP-ng ~]# mdadm --examine --brief --scan
ARRAY /dev/md/0  metadata=1.2 UUID=53461f34:2414371e:820f9514:008b6458 name=XCP-ng:0
ARRAY /dev/md/127  metadata=1.0 UUID=09871a29:26fa7ce1:0c9b040a:60f5cabf name=localhost:127

[09:46 XCP-ng ~]# cat /proc/mdstat
Personalities : [raid1] [raid6] [raid5] [raid4]
md0 : active raid5 sde[2] sdc[0] sdd[1]
      1953260544 blocks super 1.2 level 5, 512k chunk, algorithm 2 [3/3] [UUU]
      bitmap: 0/8 pages [0KB], 65536KB chunk

md127 : active raid1 sda[0] sdb[1]
      976762432 blocks super 1.0 [2/2] [UU]
      bitmap: 1/8 pages [4KB], 65536KB chunk

unused devices: <none>
This list shows both of the RAID arrays in the example system and shows that both are active and healthy. At this point it should be safe to shut down the host and reboot from CD to install the upgrade.
When installing the upgrade, no differences from a normal upgrade process are needed to account for either the RAID 1 boot array or the RAID 5 storage array. We should only need to ensure that the installer recognizes the previous installation and that we select an upgrade instead of an installation when prompted.
After the upgrade has finished and the host system reboots, there may be problems with recognizing one or both of the RAID arrays. It is very unlikely that there will be a problem with the md127 RAID 1 boot array with the most likely problem being the array operating with only one drive. Problems with the RAID 5 storage array are more likely but not common with the most likely problems being drives missing from the array or the array failing to activate.
Once the host system has rebooted, check whether the mdadm.conf and dracut_mdraid.conf files are still in the correct locations and have the correct contents. It is possible that one or both of the files have been retained; in a test upgrade from XCP-ng version 8.2 to version 8.2 on the example system, the mdadm.conf file was preserved as part of the upgrade while the dracut_mdraid.conf file was not.
Missing files can be copied from the previous system by mounting the partition containing the saved copy. If not using a software RAID 1 system drive we would need to mount the second partition of the disk used as the system drive, most likely /dev/sda2.
[15:06 XCP-ng ~]# mount /dev/md127p2 /mnt
We then copy one or both files from the original system to the correct locations in the upgraded system using one or both of the commands:
[15:08 XCP-ng ~]# cp /mnt/etc/dracut.conf.d/dracut_mdraid.conf /etc/dracut.conf.d/
[15:08 XCP-ng ~]# cp /mnt/etc/mdadm.conf /etc/
After copying the files, we unmount the original system then create a new initrd file which will contain the RAID configuration files.
[15:10 XCP-ng ~]# umount /mnt
[15:10 XCP-ng ~]# dracut --force -M /boot/initrd-$(uname -r).img $(uname -r)
If the mdadm.conf or dracut_mdraid.conf files are damaged or cannot be copied from the backup copy of the system, it should be possible to create new copies of the files by following the instructions for creating them as part of an installation then using the above dracut command to create an updated initrd file.
After the rebuilding of the initrd file has finished, it should be safe to reboot the host system. At this point, the system should start and run normally.
In some cases it is also possible to perform an upgrade using yum instead of booting from CD. This type of upgrade does not completely replace the running system and does not create a backup copy. It is really a long series of updates instead of a full replacement. When upgrading a system using yum, the mdadm.conf and dracut_mdraid.conf files should remain in place just as with updates but copies of the files should be saved before the upgrade just in case.
# More and Different
So what if we don't have or don't want a system that's identical to the example we just built in these instructions? Here are some of the possible and normal variations of software RAID under XCP-ng.
# No preexisting XCP-ng RAID 1
We might want to create a RAID storage repository even though XCP-ng was installed without software RAID where the operating system was installed to a single hard drive or some other device. This needs only minimal changes to the example configuration. Without a software RAID installed by XCP-ng, there will be no RAID 1 device md127 holding the operating system. In this case, we build the storage RAID array normally, still calling it md0 but omit any lines in the mdadm.conf and dracut_mdraid.conf which list md127. We would only include the lines in those files mentioning md0 and its UUID and the devices used to create it.
# Different Sized and Shaped RAID Arrays
We might want to create a RAID array with more or fewer drives or a different RAID level. Common types would be a two drive RAID 1 array or a 4 drive RAID 5, 6 or 10 array. Those cases are very easy to accommodate by changing the parameters when building the RAID array, altering the level= or raid-devices= parameters and the list of drives on the mdadm --create command line. The only other consideration is to make sure the drives used are accounted for in a DEVICE line in the mdadm.conf file.
The number of drives in a specific level of RAID array can also affect the performance of the array. A good rule of thumb for RAID 5 or 6 arrays is to have a number of drives that is a power of two (2, 4, 8, etc.) plus the number of extra drives where space is used for parity information, one drive for RAID 5 and two drives for RAID 6. The RAID 5 array we created in the example system meets that recommendation by having 3 drives. A 5 drive RAID5 array, or 4 or 6 drive RAID 6 arrays would as well. A good rule of thumb for RAID 10 arrays is to have an even number of drives. For RAID 10 in Linux an even number of drives is not a requirement as it is on other types of systems. In addition, it may be possible to get better performance by creating a 2 drive RAID 10 array instead of a 2 drive RAID 1 array.
# Avoiding the RAID 5 and 6 "Write Hole"
RAID 5 and 6 arrays have a problem known as the "write hole" affecting their consistency after a failure during a disk write such as a crash or power failure. The problem happens when a chunk of RAID protected data known as a stripe is changed on the array. To make the change, the operating system reads the stripe of data, changes the portion of the data requested, recomputes the disk parity for RAID 5 or RAID 6 then rewrites the data to the disks. If a crash or power outage interrupts that process some of the data written to disk will reflect the new content of the stripe while some on other disks will reflect the old content of the stripe. In general the system may be able to detect that there is a problem by rereading the entire stripe and verifying that the parity portion does not match. The system would have no way to verify which portions of the stripe were written with new data and which contain old data so would not be able to properly reconstruct the stripe after a crash.
This problem can only happen if the system is interrupted during a write to a RAID and tends to be rare.
Generally, the best way to mitigate the problem is by avoiding it. Use good quality server hardware with known stable hardware drivers to avoid possible sources of crashes. Having good power protection such as redundant power supplies and battery backup units and using software to automatically shut down in case of a power outage will limit possible power-related problems.
If that is not enough, there are other methods to avoid the write hole by making it possible for the RAID system to recover after a crash while working around the write hole problem.
For RAID 5 systems, one way to do this is using feature known as PPL or partial parity log which changes the way that data is written and recovery is performed on a RAID 5 array. Using this method comes at a cost of as much as a 30 or 40 percent lower RAID write performance. To enable it while building the RAID, substitute --consistency-policy=ppl for --bitmap=internal when creating the array. It is also possible to change an existing RAID 5 array to use this with the command mdadm --grow --bitmap=none --consistency-policy=ppl /dev/md0 (assuming the md0 array created in our example system). It is also possible to change the array back with the command mdadm --grow --bitmap=internal /dev/md0.
For RAID 6 systems, something different needs to be done. The way to close the write hole for a RAID 6 is to use a separate device which acts as a combination disk write log or journal and write cache. For best performance the device should be a disk with better write performance than the drives used in the array, preferably a fast SSD with good longevity. Going back to our example system and assuming that there is an additional device sdf, we would substitute --write-journal=/dev/sdf instead of --bitmap=internal when creating the array. To avoid the journal drive becoming a single point of failure, a good practice might be to create a RAID 1 device from the fast drives or SSDs then using that RAID device as a journal device. A write journal device may also be used for RAID 5 arrays.
# Different Sized Drives
We might need to create a RAID array where our drives are not identical and each drive has a different number of available blocks. This might come up if we need to create a RAID array but have two of one type of drive and one of another such as two WD drives and one Seagate or two 1TB drives and one that is 1.5TB or 2TB.
The easiest solution to creating a working RAID array in this situation is to partition the drives and create a RAID array using the partitions instead of using the entire drive.
To do this, we get the sizes of the disks in the system by examining the /proc/partitions file. Starting with the smallest of the disks to be used in the array, use gdisk or sgdisk to create a single partition of type fd00 (Linux RAID) using the maximum space available. Examine and record the size of the partition created and save the changes. Repeat the process with the remaining drives to be used except use the size of the partition created on the first drive instead of the maximum space available.
This should leave you with drives that each have a single partition and all of the partitions are the same size even though the drives are not.
When creating the RAID array and the mdadm.conf file, use the name of the disk partition instead of the name of the disk. In our example system, we would create the array using /dev/sdc1, /dev/sdd1, and /dev/sde1 instead of /dev/sdc, /dev/sdd, and /dev/sde and also make the same substitutions on DEVICE lines in the mdadm.conf file.
It should also be possible to create the partitions on the drives outside of the XCP-ng system using a bootable utility disk that contains partitioning utilities such as gparted.
# More Than One Additional Array
We might want to create more than one extra RAID array and storage repository. This is also easy to accommodate in a similar way to using a different number of drives in the array. We can easily create another RAID array and another storage repository onto a different set of drives by changing the parameters of the mdadm --create command line and xe sr-create command line.
As an example assume that we have 3 more drives /dev/sdf, /dev/sdg, and /dev/sdh and want to create a second RAID 5 array and another storage repository. We create another RAID 5 array, this time md1 like this:
[16:45 XCP-ng ~]# mdadm --create /dev/md1 --run --level=5 --bitmap=internal --assume-clean --raid-devices=3 --metadata=1.2 /dev/sdf /dev/sdg /dev/sdh
mdadm: array /dev/md1 started.
We then create another storage repository as we did previously making sure to give it a different name and use /dev/md1 instead of /dev/md0 in the command line.
We also need to make sure that the mdadm.conf file has DEVICE lines containing the three drives /dev/sdf, /dev/sdg, and /dev/sdh and an ARRAY line containing /dev/md1 and its UUID in addition to the other drives and arrays md127 and md0. We also need to make sure that the dracut_mdraid.conf file contains a kernel_cmdline+= line specifying the rd.md.uuid= with the UUID of the md1 array that matches what is in the mdadm.conf file in addition to the other two similar lines in that file.
It is important that each RAID array has a different name as the system will not allow you to create a RAID array with the name of one that already exists. Normally, you would just continue on with different RAID device names such as md1, md2, md3, etc. It is also important to use different names for each storage repository such as "RAID storage", "RAID storage 2" and so on.
# Guest UEFI Secure Boot
Enabling UEFI Secure Boot for guests ensures that XCP-ng VMs will only execute trusted binaries at boot. In practice, these are the binaries released by the operating system (OS) team for the OS running in the VM (Microsoft Windows, Debian, RHEL, Alpine, etc.).
# Requirements
- XCP-ng 8.2, fully up to date (>= 8.2.1).
- UEFI Secure Boot Certificates installed on the pool (this is detailed below).
- A UEFI guest VM.
- For Windows, ensure the VM has at least 2 vCPUs.
WARNING
Until we can re-sign XCP-ng's PV drivers for Windows, you will need the PV drivers from Citrix before enabling Secure Boot for a Windows VM. See Setup Secure Boot for Windows VMs.
Note: it's not necessary that the XCP-ng host boots in UEFI mode.
# How XCP-ng Manages the Certificates
TIP
To understand UEFI Secure Boot variables (PK, KEK, db and dbx), please read James Bottomley's article The Meaning of all the UEFI Keys (opens new window).
In a few words:
PK: a single X509 key, the Platform Key.KEK: one or more X509 or RSA2048 keys, the Key Exchange Key.db: the Signature Database, a list of keys, signatures or hashes. They are used to validate signed EFI binaries and loadable roms.dbx: the Forbidden Signatures Database or Revocation List, a list of keys, signatures or hashes. They are used to reject binaries or loadable roms even if they were validated using the Signature Database (db).
In this guide, we often refer to those 4 UEFI variables as the Secure Boot certificates, or simply the certificates.
The certificates are stored at several levels:
- pool level (in the XAPI database),
- host disk (it basically mirrors the certificates in the XAPI database),
- VM level (in the VM's UEFI variables).
To install or modify the certificates on the pool, use the secureboot-certs command line utility. See Configure the Pool. Once secureboot-certs is called, the XAPI DB entry for the pool is populated with a base64-encoded tarball of the UEFI certificates. Note: on XCP-ng 8.2.x, at this stage, the certificates are still not installed on disk: they only exist in the XAPI DB*. See "Host disk certificates synchronisation" below.
Host disk certificate synchronization:
- On XCP-ng 8.2.x, the certificates are updated on the host's disk (in
/var/lib/uefistored/) each time a UEFI VM starts on the host, if needed. - On any more recent release (8.3 or above), the disk certificates are synced from XAPI directly when
secureboot-certs installis run, and again at every XAPI startup afterwards if needed.
When a UEFI VM starts:
- For each UEFI variable among
PK,KEK,dbanddbx: if it's not defined yet at the VM level,uefistoredreads the corresponding file from the host's disk and populates the VM's NVRAM store with it. /!\ If an UEFI variable is already defined at the VM level, then it is not modified by XCP-ng anymore, even if its value differs from the file on the host's disk. Only the guest operating system or an admin may update it (see Change the Certificates Already Installed on a VM). Unless you remove it from the VM before the boot, in which caseuefistoredwill read the needed file(s) from disk again and populate the VM's NVRAM store again. - Based on the certificates present and the state of the VM's
platform:securebootparameter,uefistoredsets the Secure Boot state, on or off.
# Configure the Pool
The whole security of Secure Boot is based on signed certificates. So the first thing we need to do before enabling UEFI Secure Boot for guest VMs, is to install them using the secureboot-certs script on one host of the pool. This tool downloads, formats, and installs UEFI certificates for the PK, KEK, db, and dbx certificates in the XCP-ng pool.
To download and install XCP-ng's default certificates, see Install the Default UEFI Certificates.
For custom certificates (advanced use), see Install Custom UEFI Certificates
# Install the Default UEFI Certificates
secureboot-certs supports installing a default set of certificates across the pool.
Except the PK which is already present somewhere on the host's disk, all certificates are downloaded from official sources (microsoft.com and uefi.org).
The default certificates are sourced (or generated) as follows:
| Certificate | Source | CLI Arg |
|---|---|---|
| PK | /usr/share/uefistored/PK.auth (present on XCP-ng hosts, coming from the uefistored RPM) | default |
| KEK | Microsoft Corporation UEFI KEK CA 2011 (opens new window) | default |
| db | Microsoft Corporation UEFI CA 2011 (opens new window) and Microsoft Windows Production PCA 2011 (opens new window) | default |
| dbx | UEFI Revocation List (opens new window) | latest |
To install these certificates from the CLI:
# Download and install PK/KEK/db/dbx certificates
secureboot-certs install default default default latest
This can be shortened to:
secureboot-certs install
If secureboot-certs fails to download the certificates from Microsoft due to microsoft.com deciding to forbid downloads from the user agent declared by the script, you may try to download with a different user agent (for example your current browser's user agent):
secureboot-certs install --user-agent="Mozilla/5.0 My custom user agent"
If this still fails, check the next section which explains how to install them manually.
# Install the Default UEFI Certificates Manually
- Using your web browser, download the certificates listed in the table above (
KEK, CA and PCA which will allow us to builddb, anddbx). - Transfer the files to your master host.
scp Mic*.crt dbxupdate_x64.bin root@ip_of_server: - Build
db.auth:- SSH to the server as root
- convert the files from DER format to PEM:
openssl x509 -in MicCorUEFCA2011_2011-06-27.crt -inform DER -outform PEM -out ms_ca.crt openssl x509 -in MicWinProPCA2011_2011-10-19.crt -inform DER -outform PEM -out ms_pca.crt - bundle these files into
db.auth:/opt/xensource/libexec/create-auth db db.auth ms_ca.crt ms_pca.crt
- Install the certificates:
secureboot-certs install default MicCorKEKCA2011_2011-06-24.crt db.auth dbxupdate_x64.bin
# Install Custom UEFI Certificates
TIP
Advanced use, not needed by most users.
secureboot-certs also supports installing your own custom certificates. The certs may be in the following formats:
- DER-encoded certificate
- PEM-encoded certificate
- An auth file (can be created with
/opt/xensource/libexec/create-auth).
For example, to install a custom PK you may do the following:
# Enroll it, along with the default certificates, with secureboot-certs
secureboot-certs install PK.cer default default latest
The same procedure may be used to install custom KEK, db, or dbx certs.
To use multiple certificates in one variable (that is, have multiple certificates stored as a single KEK, db, or dbx), the certs must be packaged together into a .auth file, see Use two or more certificates for a Secure Boot variable. Note that multiple certificates in the PK is not supported. If an auth file with multiple certs is loaded as the PK, only the first one found will be used.
Note that the virtual firmware (uefistored + OVMF), as is allowed by the specification, does not mandate that these default certificates be signed by their parent (i.e., the KEK doesn't need to be signed by PK) if they're installed via secureboot-certs. This verification does occur, however, when trying to enroll new certificates from inside the guest after boot. This is designed to give the host administrator full control over the certificates from the control domain.
If necessary for your use case you may omit the dbx entirely. Note that this basically renders secure boot useless from a security perspective, as any binary signed with a revoked certificate will still pass Secure Boot checks! This may be done by using the following command:
# Download and install PK/KEK/db certificates, omit the dbx
secureboot-certs install default default default none
For help with the tool's install functionality, call secureboot-certs install -h.
# Enable Secure Boot for a Guest VM
# Enable Secure Boot at VM creation
During VM creation in Xen Orchestra, go to the Advanced section and select uefi as the Boot firmware. This will display a Secure boot toggle that can be clicked to enable Secure Boot.

# Enable Secure Boot for an Existing UEFI VM
# Prerequisite: make sure the VM is booting in UEFI mode
Warning: it is not recommended changing an existing VM's firmware type from BIOS to UEFI.
# Clear the certificates from the VM (optional)
Before enabling Secure Boot for an existing VM, you may want to clear the certificates from the VM so that it gets the latest ones known from the pool at the next boot.
# Enable Secure Boot for an Existing UEFI VM in XO
Shutdown the VM if it is not already shutdown.
Go to the Advanced tab of the VM and click the Secure boot toggle to enable Secure Boot.

# Enable Secure Boot for an Existing UEFI VM using xe
Shutdown the VM using the shutdown command if it is not already shut down.
In the XCP-ng CLI, set the platform Secure Boot mode to
true:
# Enable Secure Boot for the VM
xe vm-param-set uuid=<vm-uuid> platform:secureboot=true
# Setup Secure Boot for Windows VMs
Windows VMs do not require extra installation packages because the Windows Loader and kernel are signed by the keys already installed by the secureboot-certs script. Enabling Secure Boot for the VM in XCP-ng enables Secure Boot in the VM UEFI firmware.
WARNING
If your VMs have any unsigned drivers, they will fail to load after enabling Secure Boot.
Currently, only the PV drivers from Citrix work with Secure Boot.
Enabling Secure Boot on a Windows VM that has XCP-ng drivers will render the VM unbootable.
The key that signed XCP-ng drivers has expired and we are still in the process of getting a new one from Microsoft... Which is taking longer than expected (process started in August 2021).
# Setup Secure Boot for Linux VMs
In theory (read why it's in theory in the Boothole and fallouts box below), the installers for mainstream Linux distributions (debian, RHEL, etc.) should install properly signed bootloaders and binaries, and should be installable in SB mode directly. Some other Linux distributions may require special packages for Secure Boot to function. Check that the distribution does support Secure Boot and follow the distribution's documentation to install any required Secure Boot software (e.g., shim) before enabling Secure Boot for the VM in XCP-ng.
WARNING
If the VM has any unsigned kernel modules, they will fail to load after enabling Secure Boot. Furthermore, the distribution will likely restrict other kernel features that are seen as loop holes in Secure Boot (kexec, /dev/mem, etc…). Please read the Secure Boot documentation from the distribution.
Boothole and fallouts
2020 and 2021 have been complicated years for Secure Boot on Linux, due to major security flaws in grub ("Boothole" and its fallouts). Thus all certificates that allowed Linux distributions to boot in SB mode have been revoked, twice, and new ones have (or had) to be issued.
Consequences:
- Any installer that is not recent enough will fail to boot in Secure Boot mode if the most recent revocation list (
dbx) is used (which is highly recommended if security is your objective). - Distributions using the revoked certificates require updates before SB can be enabled (and possibly manual changes?).
- Depending on when you read this, there may not be a solution yet for your distribution.
# Disable Secure Boot for a Guest VM
# Disable Secure Boot for a Guest VM using XO
Navigate to the Advanced tab and use the Secure boot toggle to disable Secure Boot. Reboot the VM and Secure Boot will be disabled.
# Disable Secure Boot for a Guest VM using xe
In the XCP-ng CLI:
# Disable Secure Boot for the VM
xe vm-param-set uuid=<vm-uuid> platform:secureboot=false
Reboot the VM and Secure Boot will be disabled.
# Secure Boot and revoked certificates
# Revocation database updates
When there are security concerns related to some of the certificates involved in binary signing, they are revoked. That is, they are added to the dbx certificate revocation database.
On actual hardware, this dbx update would be propagated to you through a firmware update, or be coming from your OS itself. For example, Microsoft updates the dbx database of the computer as part of its KB4535680 (opens new window) security update.
In a virtualization environment like XCP-ng, we recommend that you use the latest dbx and update it regularly.
- Follow the installation instructions again to update the certificates at the pool level.
- Any new VM will use the updated certificate databases the first time it starts.
- Existing VMs won't be affected (unless they've never been booted after the first time you installed certificates to the pool).
- Either let the OS update the dbx in your existing VMs (Windows does that (opens new window) and we are not aware of other OSes that do it), clear the VM certificates so that it gets the latest ones known from the pool at the next boot, or update manually.
# VMs that won't boot due to a revoked certificate
Installed OSes and installation media that were previously perfectly bootable in Secure Boot mode may become unbootable after the certificate that signed their binaries is revoked.
This is what happened in 2021 to the certificates used by all Linux distributions that support Secure Boot, due to major security flaws in grub.
You are likely to have issues related to this in one of the following situations:
- You try to install a new (Linux) VM with an installation media whose binaries have been revoked.
- You try to enable Secure Boot on an existing (Linux) VM that was not enforcing Secure Boot previously, and this VM has signed binaries that have been revoked.
- You manually updated the dbx on an existing (Linux) VM.
Despite this, we still recommend that you always install the latest revocation database (dbx) on your pools. Not doing so lowers the security of Secure Boot, as any malicious binary signed with a revoked certificate would pass Secure Boot checks.
If you can't boot an installation media:
- Check whether their exists an updated installer signed with a valid certificate. If yes, use it.
- Else go to "It still can't boot" below.
If you can't boot an existing VM:
- Disable Secure Boot, update the OS, follow any instructions from the OS provider related to the update of the signed binaries, power off, re-enable Secure Boot, try to boot.
- Else go to "It still can't boot" below.
It still can't boot:
- either disable Secure Boot for the VM, as its binaries are not secure anymore anyway. This can be temporary until an update brings properly signed binaries.
- or install an older
dbxto the VM, downloaded from the archive of prior versions ofdbxfiles (opens new window). Let us stress again that this exposes the VM to risk, and therefore, we recommend that before choosing an archiveddbxusers evaluate the vulnerabilities that their guest system will be exposed to by omitting the most recent revocations. Above all, downgrading thedbxmust not give you a dangerous false sense of security.
# Certificate Management
# View Certificates Already Installed on System
To view the default certificates that are available pool-wide:
secureboot-certs report
To view the certificates already installed into a VM's firmware:
varstore-ls <vm-uuid>
and then to see the full cert:
varstore-get <vm-uuid> <guid> <name> | hexdump -Cv
The GUID and name for varstore-get are the values returned by varstore-ls.
# Change the Certificates Already Installed in a Pool
To change the certificates in a pool, simply call secureboot-certs install in the same ways as described in Configure the Pool.
The new certificates will be used for new VMs, but will not be automatically propagated to existing VMs. If you want an existing VM to use the new certificates, either clear the VM certificates so that it gets the latest ones known from the pool at the next boot, or update manually.
# Remove Certificates from the Pool
To remove the installed certs in the pool:
secureboot-certs clear
TIP
Note that this does not remove the certs from the VMs. On XCP-ng 8.2.x it doesn't remove them from host disk either.
- On XCP-ng 8.2.x: to remove them from disk, remove the ".auth" files for the certs you'd like to remove, on every host (found in
/var/lib/uefistored/). - On XCP-ng 8.3 and later, host disk certificates will be removed by the clear command.
- In order to clear the certs from the VMs it is required to use
varstore-rm. See Remove Certificates from a VM.
# Change the Certificates Already Installed on a VM
TIP
If you came here with the idea to update the VM certificates with certificates from the pool, then go to Remove Certificates from a VM instead.
A VM will usually have its own copy of the UEFI certificates (unless it never booted on a host that has certificates installed). To verify this, execute:
varstore-ls <vm-uuid>
If the relevant certs are installed, their names will be in the output (i.e., PK, KEK, db, or dbx).
To update an individual certificate in the VM's NVRAM store:
- Create or download an X509 certificate, or a
.authcertificate list file. - If you are starting with an X509 certificate, use
/opt/xensource/libexec/create-authto convert it into a.authfile. - Shutdown the VM
- Use varstore-set to load the .auth file into a VM. The attributes arg must be set to 0x27.Where name is one of
varstore-set <vm-uuid> <guid> <name> 0x27 path/to/file.authPK,KEK,dbanddbx. The GUIDs for each variable are:8be4df61-93ca-11d2-aa0d-00e098032b8c PK 8be4df61-93ca-11d2-aa0d-00e098032b8c KEK d719b2cb-3d3a-4596-a3bc-dad00e67656f db d719b2cb-3d3a-4596-a3bc-dad00e67656f dbx
# Remove Certificates from a VM
In order to clear the VM's certificates, shutdown the VM and execute varstore-sb-state <vm-uuid> setup.
TIP
varstore-sb-state <vm-uuid> setup wipes previously installed Secure Boot certificates at the VM level (if there were any). Upon boot, they will be replaced by the certificates found on the host's disk or in the pool's XAPI database, if any are present, as described in How XCP-ng Manages the Certificates
If you prefer to remove a specific certificate, use varstore-rm <vm-uuid> <guid> <name>.
For example, to remove the dbx from a VM.
varstore-rm <vm-uuid> d719b2cb-3d3a-4596-a3bc-dad00e67656f dbx
Note that the GUID may be found by using varstore-ls <vm-uuid>.
TIP
Any certificate removed from the VM but still present in the pool configuration or on the host's disk at /var/lib/uefistored/ will be automatically added back the next time the VM starts (unless another certificate it depends on was manually removed from /var/lib/uefistored/).
# Misc
# Secure Boot and the UEFI Firmware Menu in the Guest
Disabling and enabling Secure Boot from the UEFI firmware menu inside the guest VM is explicitly disallowed on XCP-ng so as to ensure that guest users can not tamper with the Secure Boot policy set by the host administrator. This differs from enabling Secure Boot on physical hardware because that is typically done through the UEFI menu. On XCP-ng, instead, that privilege is given only to host administrators through the uefistored daemon and varstored-tools package.
Changes to the UEFI secure boot state in the UEFI menu will be ignored in favor of the host administrator's configuration. For example, deselecting Attempt Secure Boot will not disable Secure Boot on the next boot, although it would do so on a physical platform.
If disabling Secure Boot by removing keys via Custom Mode is attempted in the UEFI firmware menu, an error will display stating Only Physical Presence User could delete NAME_OF_KEY in custom mode! For example, if attempting to remove the PK:

# Check whether a VM runs on UEFI firmware
In Xen Orchestra, this can be checked in the VM's Advanced tab.
From command line, use:
xe vm-param-get uuid=<vm-uuid> param-name=HVM-boot-params param-key=firmware
# Check UEFI Secure Boot status from inside the VM
Enabling Secure Boot for a VM means that it will either boot an appropriately signed bootloader and OS kernel, or not boot at all if the Secure Boot checks didn't pass.
You may still want to verify, from inside a booted VM, whether Secure Boot was enforced or not.
On Linux VMs, you can either:
- run
dmesg -i secureboot, which works on many distributions (not all) and should give you a line that looks likesecureboot: Secure boot enabled - or, if
mokutilis installed, runmokutil --sb-state, which should outputSecureBoot enabled - or directly extract the information from the UEFI variables:The result should be either
# read the last byte of the SecureBoot variable and display it in hex format tail -c1 /sys/firmware/efi/efivars/SecureBoot-8be4df61-93ca-11d2-aa0d-00e098032b8c | xxd -p01(enabled) or00(disabled)
On Windows VMs, you can either:
- run
msinfo32and check the value ofSystem Summary/Secure Boot State(expected:On) - or, from PowerShell as admin, run
Confirm-SecureBootUEFI(expected:True)
# Use two or more certificates for a Secure Boot variable
To create a Secure Boot variable (PK, KEK, db, or dbx) with multiple certificates, it is required to use the create-auth tool to bundle the certificates into a single .auth file.
From command line, to create a KEK with certifcates cert1.crt and cert2.crt:
/opt/xensource/libexec/create-auth KEK KEK.auth cert1.crt cert2.crt
To create the same auth as above, but also sign it with a custom key:
/opt/xensource/libexec/create-auth -c signer.crt -k signer.key KEK KEK.auth cert1.crt cert2.crt
After creating the auth file, use secureboot-certs to install it with the rest of your certs:
# Install custom KEK, download and install public PK/db/dbx certificates
secureboot-certs install default KEK.auth default latest
This may be done with any PK, KEK, db, or dbx.