• 0 Votes
    14 Posts
    2k Views
    acebmxerA
    So if i set VMs to Best-effort or disabled for HA i get not enough memory. @pkgw Do you have Twinstore configured and/or HA enabled? If no I will continue my issues at the twinstore post. If i set to restart i get this.... host.setMaintenanceMode { "id": "35233210-4e37-4703-9bf6-9e8a9c24df9f", "maintenance": true } { "code": "HA_OPERATION_WOULD_BREAK_FAILOVER_PLAN", "params": [], "call": { "duration": 5, "method": "host.disable", "params": [ "* session id *", "OpaqueRef:d9bd976f-445c-8244-1b56-879f446efc12" ] }, "message": "HA_OPERATION_WOULD_BREAK_FAILOVER_PLAN()", "name": "XapiError", "stack": "XapiError: HA_OPERATION_WOULD_BREAK_FAILOVER_PLAN() at XapiError.wrap (file:///opt/xen-orchestra/packages/xen-api/_XapiError.mjs:16:12) at file:///opt/xen-orchestra/packages/xen-api/transports/json-rpc.mjs:38:21 at runNextTicks (node:internal/process/task_queues:65:5) at processImmediate (node:internal/timers:472:9)" }
  • XO unresponsive when Remote storage is offline.

    4
    0 Votes
    4 Posts
    556 Views
    olivierlambertO
    Great! I think this is really the best possible approach to make it clean
  • 0 Votes
    2 Posts
    465 Views
    olivierlambertO
    Hi, IP conflict?
  • How to Setup IPMI in XO

    41
    0 Votes
    41 Posts
    10k Views
    A
    @All-Ki Thanks for your work! ProLiant DL360p Gen8 UID Light | 0x01 | ok Sys. Health LED | no reading | ns 01-Inlet Ambient | 33 degrees C | ok 02-CPU 1 | 55 degrees C | ok 03-CPU 2 | 50 degrees C | ok 04-P1 DIMM 1-6 | 45 degrees C | ok 05-P1 DIMM 7-12 | 44 degrees C | ok 06-P2 DIMM 1-6 | 38 degrees C | ok 07-P2 DIMM 7-12 | 43 degrees C | ok 08-P1 Mem Zone | 42 degrees C | ok 09-P1 Mem Zone | 45 degrees C | ok 10-P2 Mem Zone | 39 degrees C | ok 11-P2 Mem Zone | 40 degrees C | ok 12-HD Max | 35 degrees C | ok 13-Chipset 1 | 52 degrees C | ok 14-Chipset1 Zone | 45 degrees C | ok 15-P/S 1 Inlet | 34 degrees C | ok 16-P/S 1 Zone | 40 degrees C | ok 17-P/S 2 Inlet | 42 degrees C | ok 18-P/S 2 Zone | 43 degrees C | ok 19-PCI #1 | disabled | ns 20-PCI #2 | disabled | ns 21-VR P1 | 60 degrees C | ok 22-VR P2 | 56 degrees C | ok 23-VR P1 Mem | 39 degrees C | ok 24-VR P1 Mem | 36 degrees C | ok 25-VR P2 Mem | 32 degrees C | ok 26-VR P2 Mem | 36 degrees C | ok 27-VR P1Mem Zone | 38 degrees C | ok 28-VR P1Mem Zone | 36 degrees C | ok 29-VR P2Mem Zone | 31 degrees C | ok 30-VR P2Mem Zone | 33 degrees C | ok 31-HD Controller | 71 degrees C | ok 32-HD Cntlr Zone | 52 degrees C | ok 33-PCI 1 Zone | 43 degrees C | ok 34-PCI 1 Zone | 46 degrees C | ok 35-LOM Card | 70 degrees C | ok 36-PCI 2 Zone | 50 degrees C | ok 37-System Board | 52 degrees C | ok 38-System Board | 45 degrees C | ok 39-Sys Exhaust | 43 degrees C | ok 40-Sys Exhaust | 46 degrees C | ok 41-Sys Exhaust | 46 degrees C | ok 42-SuperCAP Max | 33 degrees C | ok Fan Block 1 | 94.86 percent | ok Fan Block 2 | 94.86 percent | ok Fan Block 3 | 94.86 percent | ok Fan Block 4 | 94.86 percent | ok Fan Block 5 | 94.86 percent | ok Fan Block 6 | 94.86 percent | ok Fan Block 7 | 94.86 percent | ok Fan Block 8 | 94.86 percent | ok Power Supply 1 | 205 Watts | ok Power Supply 2 | 210 Watts | ok Power Meter | 430 Watts | ok Power Supplies | 0x01 | ok Fans | 0x02 | ok Memory | 0x40 | ok C1 P1I Bay 1 | 0x01 | ok C1 P1I Bay 2 | 0x01 | ok C1 P1I Bay 3 | 0x01 | ok C1 P1I Bay 4 | 0x01 | ok C1 P2I Bay 5 | 0x01 | ok C1 P2I Bay 6 | 0x01 | ok C1 P2I Bay 7 | 0x01 | ok C1 P2I Bay 8 | 0x01 | ok ProLiant DL360 Gen10 UID | 0x01 | ok SysHealth_Stat | 0x01 | ok 01-Inlet Ambient | 19 degrees C | ok 02-CPU 1 | 52 degrees C | ok 03-CPU 2 | 63 degrees C | ok 04-P1 DIMM 1-6 | disabled | ns 05-PMM 1-6 | disabled | ns 06-P1 DIMM 7-12 | 44 degrees C | ok 07-PMM 7-12 | disabled | ns 08-P2 DIMM 1-6 | disabled | ns 09-PMM 1-6 | disabled | ns 10-P2 DIMM 7-12 | 48 degrees C | ok 11-PMM 7-12 | disabled | ns 12-HD Max | 35 degrees C | ok 13-Exp Bay Drive | disabled | ns 14-Stor Batt 1 | 18 degrees C | ok 15-Front Ambient | 24 degrees C | ok 16-VR P1 | 48 degrees C | ok 17-VR P2 | 54 degrees C | ok 18-VR P1 Mem 1 | 31 degrees C | ok 19-VR P1 Mem 2 | 29 degrees C | ok 20-VR P2 Mem 1 | 35 degrees C | ok 21-VR P2 Mem 2 | 36 degrees C | ok 22-Chipset | 42 degrees C | ok 23-BMC | 79 degrees C | ok 24-BMC Zone | 49 degrees C | ok 26-HD Cntlr Zone | 40 degrees C | ok 29-I/O Zone | 37 degrees C | ok 30-PCI 1 | disabled | ns 31-PCI 1 Zone | 45 degrees C | ok 32-PCI 2 | disabled | ns 33-PCI 2 Zone | 44 degrees C | ok 34-PCI 3 | disabled | ns 35-PCI 3 Zone | disabled | ns 37-Rear HD Max | disabled | ns 38-Battery Zone | 43 degrees C | ok 39-P/S 1 Inlet | 42 degrees C | ok 40-P/S 2 Inlet | 48 degrees C | ok 41-P/S 1 | 46 degrees C | ok 42-P/S 2 | 55 degrees C | ok 43-E-Fuse | 45 degrees C | ok 44-P/S 2 Zone | 53 degrees C | ok 49-CPU 1 PkgTmp | 84 degrees C | ok 50-CPU 2 PkgTmp | 94 degrees C | ok 61-AHCI HD Max | disabled | ns 69-PCI 1 M2 | disabled | ns 70-PCI 1 M2 Zn | disabled | ns 71-PCI 2 M2 | disabled | ns 72-PCI 2 M2 Zn | disabled | ns 73-PCI 3 M2 | disabled | ns 74-PCI 3 M2 Zn | disabled | ns Fan 1 | 0x01 | ok Fan 1 DutyCycle | 26.26 percent | ok Fan 1 Presence | 0x02 | ok Fan 2 | 0x01 | ok Fan 2 DutyCycle | 23.52 percent | ok Fan 2 Presence | 0x02 | ok Fan 3 | 0x01 | ok Fan 3 DutyCycle | 23.52 percent | ok Fan 3 Presence | 0x02 | ok Fan 4 | 0x01 | ok Fan 4 DutyCycle | 23.52 percent | ok Fan 4 Presence | 0x02 | ok Fan 5 | 0x01 | ok Fan 5 DutyCycle | 23.52 percent | ok Fan 5 Presence | 0x02 | ok Fan 6 | 0x01 | ok Fan 6 DutyCycle | 24.30 percent | ok Fan 6 Presence | 0x02 | ok Fan 7 | 0x01 | ok Fan 7 DutyCycle | 24.30 percent | ok Fan 7 Presence | 0x02 | ok Power Supply 1 | 0x01 | ok PS 1 Input | 200 Watts | ok Power Supply 2 | 0x01 | ok PS 2 Input | 190 Watts | ok Power Meter | 400 Watts | ok Fans | 0x01 | ok Power Supplies | 0x01 | ok Memory Status | 0x40 | ok Megacell Status | 0x04 | ok Intrusion | Not Readable | ns CPU Utilization | 252 unspecified | ok PS 1 Output | 190 Watts | ok PS_Volt_Out_01 | 12 Volts | ok PS_Volt_In_01 | 205 Volts | ok PS_Curr_Out_01 | 15.80 Amps | ok PS_Curr_In_01 | 1 Amps | ok PS 2 Output | 180 Watts | ok PS_Volt_Out_02 | 12 Volts | ok PS_Volt_In_02 | 204 Volts | ok PS_Curr_Out_02 | 15.10 Amps | ok PS_Curr_In_02 | 0.90 Amps | ok 27.1-LOM-Communi | 68 degrees C | ok 28.1-LOM Card-I/ | 84 degrees C | ok 25.1-HD Controll | 39 degrees C | ok 25.2-HD Controll | 45 degrees C | ok 25.3-HD Controll | 41 degrees C | ok LOM_Link_P1 | 0x02 | ok LOM_Link_P2 | Not Readable | ns LOM_Link_P3 | Not Readable | ns LOM_Link_P4 | Not Readable | ns ALOM_Link_P1 | 0x02 | ok ALOM_Link_P2 | 0x02 | ok Dr_Stat_1I1_B001 | 0x01 | ok Dr_Stat_2I1_B005 | 0x01 | ok CPU_Stat_C1 | 0x80 | ok CPU_Stat_C2 | 0x80 | ok
  • CBR start operation is blocked

    4
    0 Votes
    4 Posts
    732 Views
    M
    Hello. Thank you for your input. I am aware, that this is more of a warning message, than a error. I´m just trying to figure out, what is my best way to go here. My plan was: Setup a repljob for the vm in a lets say hourly interval On the day of the migration, shutdown the vm and start the last replication manually Disable the cr job Start the replicated vm on the new pool, check it and if all is ok, use it as new vm, otherwise start the old vm. The documentation says "If you want to start a VM on your destination host without breaking the CR jobs". Tbh i dont care about breaking the job. If everything works fine, i dont need it anymore, if not, i can setup a new job pretty fast. I was just wondering, if the new vm will stay in "blocked mode" for ever. Kind regards
  • Create a new SR: qcow2 failure

    9
    7
    0 Votes
    9 Posts
    2k Views
    N
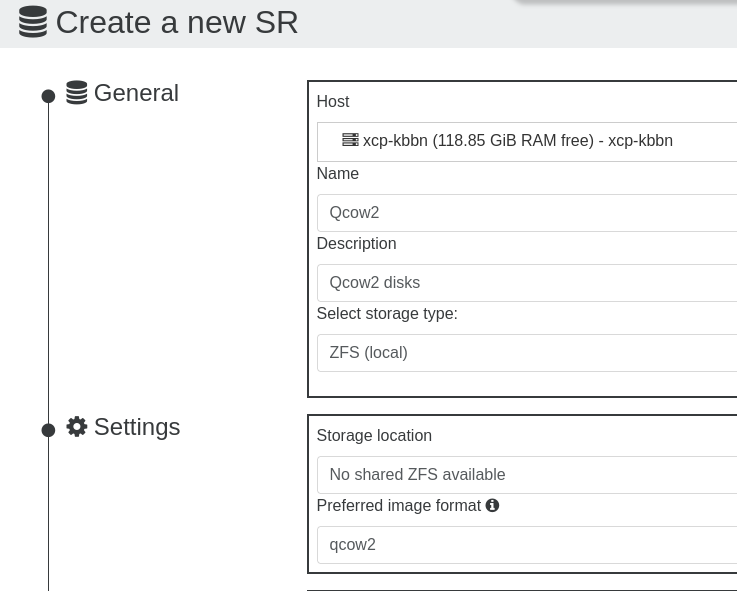
    @florent said: where does this disk comes from From my Redhat 10 @florent said: if you have access to your SR from the outside, you can also put the qcow2 file directly I create a VM to be a NFS to access the 3 HDs, the qcow disks are on the Redhat 10 that I was trying to import from. Do you mean I put the qcow disks on one of the HDs and access them when I create a VM?
  • Attach a Physical HD to a VM?

    6
    0 Votes
    6 Posts
    1k Views
    N
    @dthenot said: you will also likely need to give the host-uuid of the host the disk is on Thanks, and I'm assuming this UUID or Machine ID from: [14:45 xcp-kbbn NAS]# dmidecode --type SYSTEM # dmidecode 3.0 Getting SMBIOS data from sysfs. SMBIOS 3.3.0 present. # SMBIOS implementations newer than version 3.0 are not # fully supported by this version of dmidecode. Handle 0x0001, DMI type 1, 27 bytes System Information Manufacturer: ASUS Product Name: System Product Name Version: System Version Serial Number: System Serial Number UUID: E7AE9723-CB08-A278-5C45-7C10C9473BD0 Wake-up Type: Power Switch SKU Number: SKU Family: To be filled by O.E.M. OR [12:46 xcp-kbbn NAS]# hostnamectl Static hostname: xcp-kbbn Icon name: computer-desktop Chassis: desktop Machine ID: c668f529e66c42b9815fe12f3401df82 Boot ID: dd70b200b25341c688aee9fbc58d20a2 Virtualization: xen Operating System: XCP-ng 8.3 Kernel: Linux 4.19.0+1 Architecture: x86-64 the command would look like this correct: xe sr-create type=udev device-config:location=/srv/NAS name-label="NAS Disks" host-uuid=E7AE9723-CB08-A278-5C45-7C10C9473BD0 or c668f529e66c42b9815fe12f3401df82 UPDATE: I tried the new command but I got these error messages: [14:45 xcp-kbbn NAS]# xe sr-create type=udev device-config:location=/srv/NAS name-label="NAS Disks" host-uuid=E7AE9723-CB08-A278-5C45-7C10C9473BD0 The uuid you supplied was invalid. type: host uuid: E7AE9723-CB08-A278-5C45-7C10C9473BD0 [15:14 xcp-kbbn NAS]# ls [15:19 xcp-kbbn NAS]# xe sr-create type=udev device-config:location=/srv/NAS name-label="NAS Disks" host-uuid=c668f529e66c42b9815fe12f3401df82 The uuid you supplied was invalid. type: host uuid: c668f529e66c42b9815fe12f3401df82 then I was successful (I believe with you confirmation) when I left our the host-uuid param: [15:19 xcp-kbbn NAS]# xe sr-create type=udev device-config:location=/srv/NAS name-label="NAS Disks" b802722e-67ac-5aba-8d6c-e565d2d7fa0d and then it was listed as a SR: [image: Screenshot From 2026-05-18 15-24-03.png] now to the next task command: xe sr-scan uuid=b802722e-67ac-5aba-8d6c-e565d2d7fa0d was successful, but I have another Question, the size of the device is not showing, is this normal being that it was done this way? UPDATE 2.0: I just discovered the xe command: [15:27 xcp-kbbn NAS]# xe host-list uuid ( RO) : 9a5e5bb3-bdb9-41ea-9505-6f6fe630f369 name-label ( RW): xcp-kbbn the uuid does not match the ones provided above, do I need to remove the SR and do it over again using this uuid? I will give it a try using another folder.... UPDATE 2.1: I executed the command using the above uuid: [15:35 xcp-kbbn srv]# xe sr-create type=udev device-config:location=/srv/NAS name-label="NAS Disks" host-uuid=9a5e5bb3-bdb9-41ea-9505-6f6fe630f369 6fc531a0-19a0-b9c1-c78e-c687fce5ff84 and was successful, but now my question for the device size, is it normal or not due to creating it this way? UPDATE 2.2: I forgot to do: ln -s /dev/sda /srv/NAS/sda #although it might be better to use a stable identifier if you have multiple disks xe sr-scan uuid=<UUID of the udev SR> be right back..... UPDATE 3.0: Success, I have all HDs attached to my VM, access all files and the sizes are reported! : [image: Screenshot From 2026-05-18 17-25-38.png] List of attached disks: [image: Screenshot From 2026-05-18 17-18-07.png] The VM: [image: Screenshot From 2026-05-18 17-51-19.png] Thanks for your help!...
  • Tag-Based Automation: Manage VM CPU Priority via assigned tag.

    37
    1 Votes
    37 Posts
    6k Views
    tjkreidlT
    @johnnezero The full HTML versions will render much better. The PDF conversion is less than perfect. iIll try to get those uploaded, as well.
  • Old VM:s shows up

    2
    1
    0 Votes
    2 Posts
    660 Views
    poddingueP
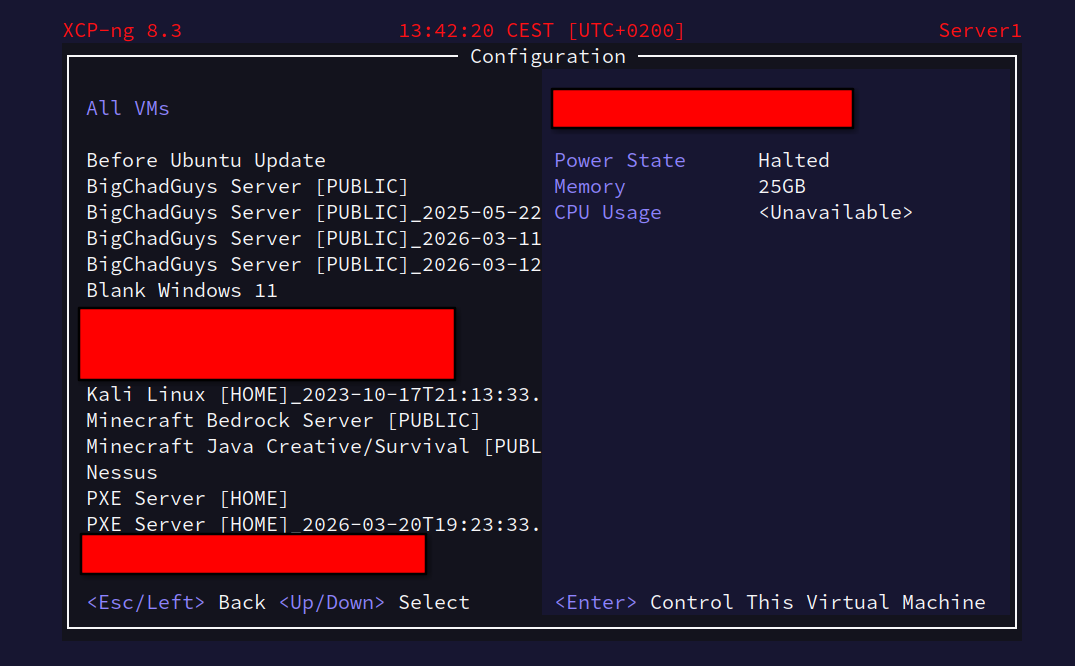
    Hi! I think what you're seeing may be stale entries in the XAPI database, ghost records that can survive upgrades or host reconfigurations. From what I've read, xe vm-destroy uuid=<vm-uuid> removes the record without touching any storage, which seems like what you need here; the xe CLI reference confirms storage is left intact. I think you can get the UUID first with xe vm-list name-label="Before Ubuntu Update" (replacing the name with whichever one you're after). I'm not entirely sure why xsconsole would show them but XO wouldn't, so if the VMs don't turn up in xe vm-list, it might be worth a mention to Team-XAPI-Network, they'll know the right way to dig into XAPI state.
  • Understanding Auto Power On | Auto Start

    4
    0 Votes
    4 Posts
    999 Views
    P
    @poddingue there is a notion of appliance too (group of VMs) https://docs.xcp-ng.org/appendix/cli_reference/#appliance-commands where you can start/stop a group of VMs, never tried it, doesn't seem to have a boot order in the vAPP neither
  • 0 Votes
    6 Posts
    908 Views
    florentF
    @bvivi57 xo do check license if you have xostor installed, since it need some magic to work at a lot of steps ( like the rolling pool updates) this is the expected behavior with a manually installed xostor ( cc @julienxovates for information )
  • RPU Failure on 8.3: Yum HTTPS 500 Error for xo-lite package (Hung Task)

    Unsolved
    4
    2
    0 Votes
    4 Posts
    697 Views
    K
    @julienXOvates Got it. I didn't get a chance to work on this over the weekend, so sometime this week, I'll just bounce the host and see if it comes back. Right now, while I can SSH into it, the admin console appears to be frozen and unresponsive (over iLO).
  • Difference between Pool's CPU usage stats and Host CPU usage stats

    4
    0 Votes
    4 Posts
    847 Views
    P
    @delacosta456 said: the pool host maximum limit is 3200% right right
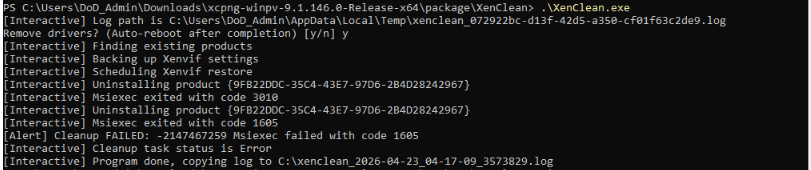
  • XenClean | Cleanup Failed on Windows Server 2022 VM

    3
    1
    0 Votes
    3 Posts
    1k Views
    K
    @dinhngtu Thanks for the fast response, as always.
  • Lates commit breaks install

    19
    0 Votes
    19 Posts
    2k Views
    acebmxerA
    @gregbinsd let us know. If you do use my script. It pulls nodejs from NodeSource so it may not install the latest 24.15.0 tls. If you specific 24.15.0 it will install that version. If you need to change node version with my script use the rebuild option.
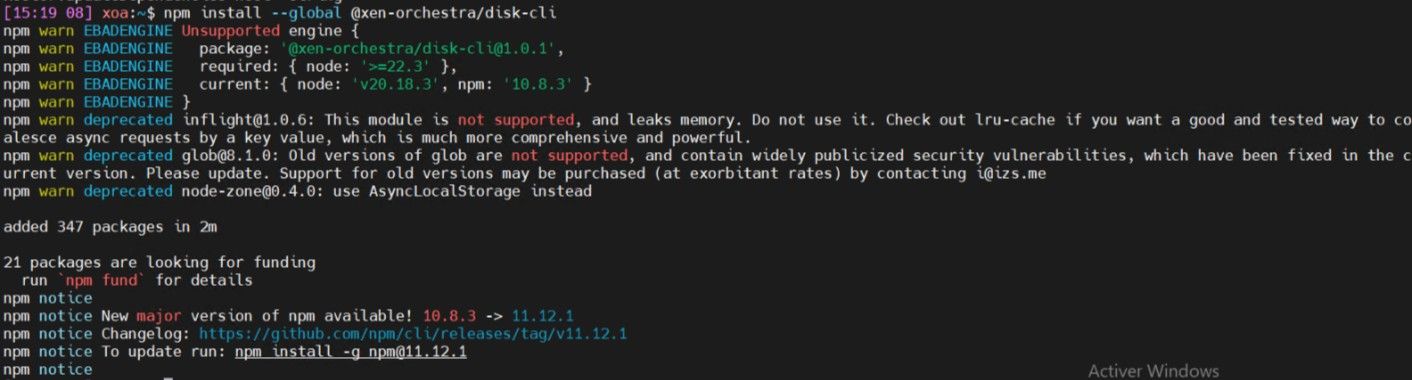
  • xo-disk-cli on latest XOA node.js problem

    10
    1
    0 Votes
    10 Posts
    1k Views
    M
    @Andrew Yeah but XOA is still using it hence my interest in aligning my XO-CE instance with XOA as close as possible.
  • How to unbind trial license

    3
    0 Votes
    3 Posts
    604 Views
    G
    Hello @tsukraw , normally your client should be able to bind the new license on their XOA. BTW, you talk about binding the license to a pool but an XOA license is bound to an XOA. I suggest your customer open a support ticket so we can help them with that issue.
  • Unable to copy template

    4
    0 Votes
    4 Posts
    711 Views
    Tristis OrisT
    While I was updating all the pools, a micro-update for 5 packages was released again. They come out every week now. Same issue with basic migration. Now it impossible.
  • Double CR backup

    18
    1
    0 Votes
    18 Posts
    2k Views
    olivierlambertO
    Ping @Team-XO-Backend
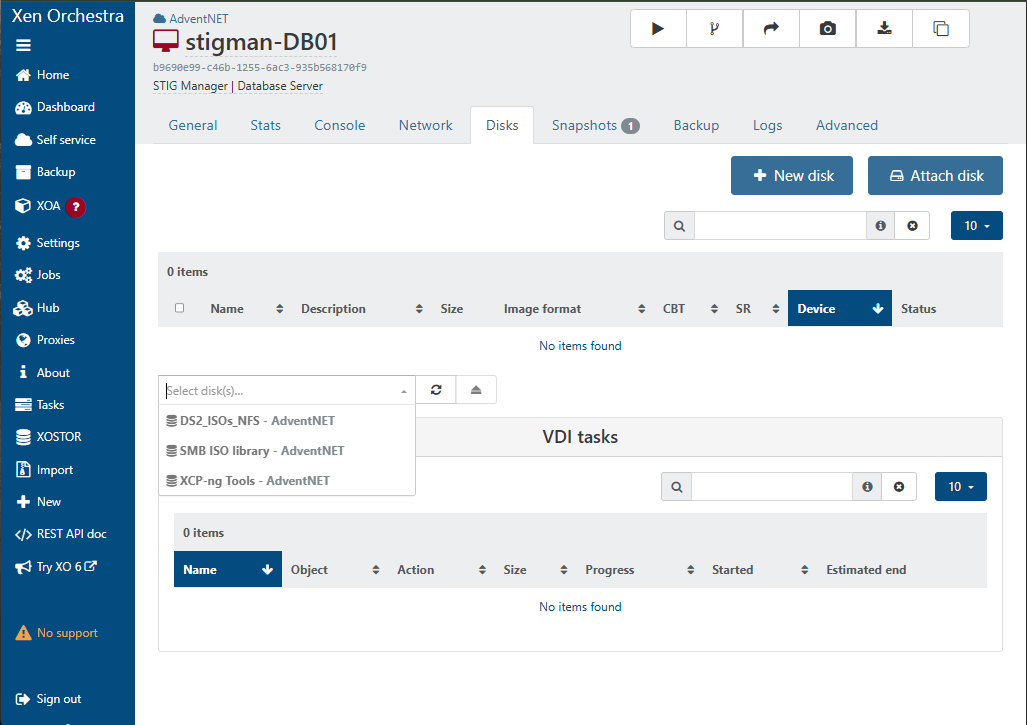
  • VM Unable to Attach ISOs After Reverting Snapshot

    Unsolved
    3
    2
    0 Votes
    3 Posts
    472 Views
    K
    @dinhngtu Yeah, I suspected that as well. So I inspected the SR and it showed connected to both hosts (at least in the XO UI - I didn't drop to the CLI to really confirm). By altering my workflow a bit and slowing down, I seem to have found the right "sweet spot" of delay and the issue hasn't resurfaced. Here's what I'm doing now, when I need to revert the snapshots of all three VMs: In the XO VM list, I select the three VMs and power them off at the same time. I then start with VM1 and eject the ISO, VM2 and eject the ISO, then VM3 and eject the ISO. By the time I circle back to VM1 for the next step, about 10-15 secs have elapsed. I then start with VM1 and revert the snapshot, and repeat the same on VM2 and VM3. By the time I circle back to VM1 for the next step, another 10-15 secs have elapsed. I re-attach the ISO to all three VMs in sequence. Another 10-15 secs elapse. I then start with VM1 and power all three VMs sequentially. The entire workflow takes about 30-45 secs, and I'm finding that by doing this, the issue hasn't resurfaced.